Updating Cisco Nexus Switch Firmware

My HomeLab network was recently treated to a networking upgrade in the form of a Cisco Nexus 5010 switch. Whilst it’s been working absolutely fine, it occurred to me the version of NX-OS (Cisco’s operating system for Nexus devices) installed was from 2009 and could probably do with an update.
Nexus devices run NX-OS, not Cisco iOS, as is typically seen on other Cisco products such as the Catalyst switch range. As such the upgrade process is a little different for this operating system.
In this post I’ll be showing how I sourced the firmware for my device and the steps required to update it to the latest NX-OS version as of September 2018.
Sourcing Firmware
Nexus devices require two .bin firmware files in order to boot. One is a ‘kickstart’ file which contains the kernel. The other is the main NX-OS software.
For those with Cisco SmartNet contracts this is the easy part. Simply login to the Cisco website and download a firmware image for your device.
For everyone else, you’ll either need to source a suitable firmware image by searching online or contacting Cisco directly. On some occasions, Cisco will provide out-of-contract firmware updates free of charge if you can show there’s a known security issue with your device. More info here.
In my case I did contact Cisco but they were unable to help as the Nexus 5010 is now end-of-life. After some searching I managed to find the following website which seems to keep a stockpile of Cisco firmware images:
http://sfree.ws/model?main_group_id=1&child_group_id=52&model_id=968
If you know of somewhere to source the firmware please let me know in the comments.
Uploading the Firmware
So far we’ve downloaded two .bin firmware files for our Nexus device. We’ll now need to transfer both of these files to the internal storage on our device and then instruct NX-OS to use these image files on the next system boot.
To transfer the files we’ll need an SCP server. I’d recommend using Solarwinds SCP server on Windows. Download it from here:
https://www.solarwinds.com/free-tools/free-sftp-server
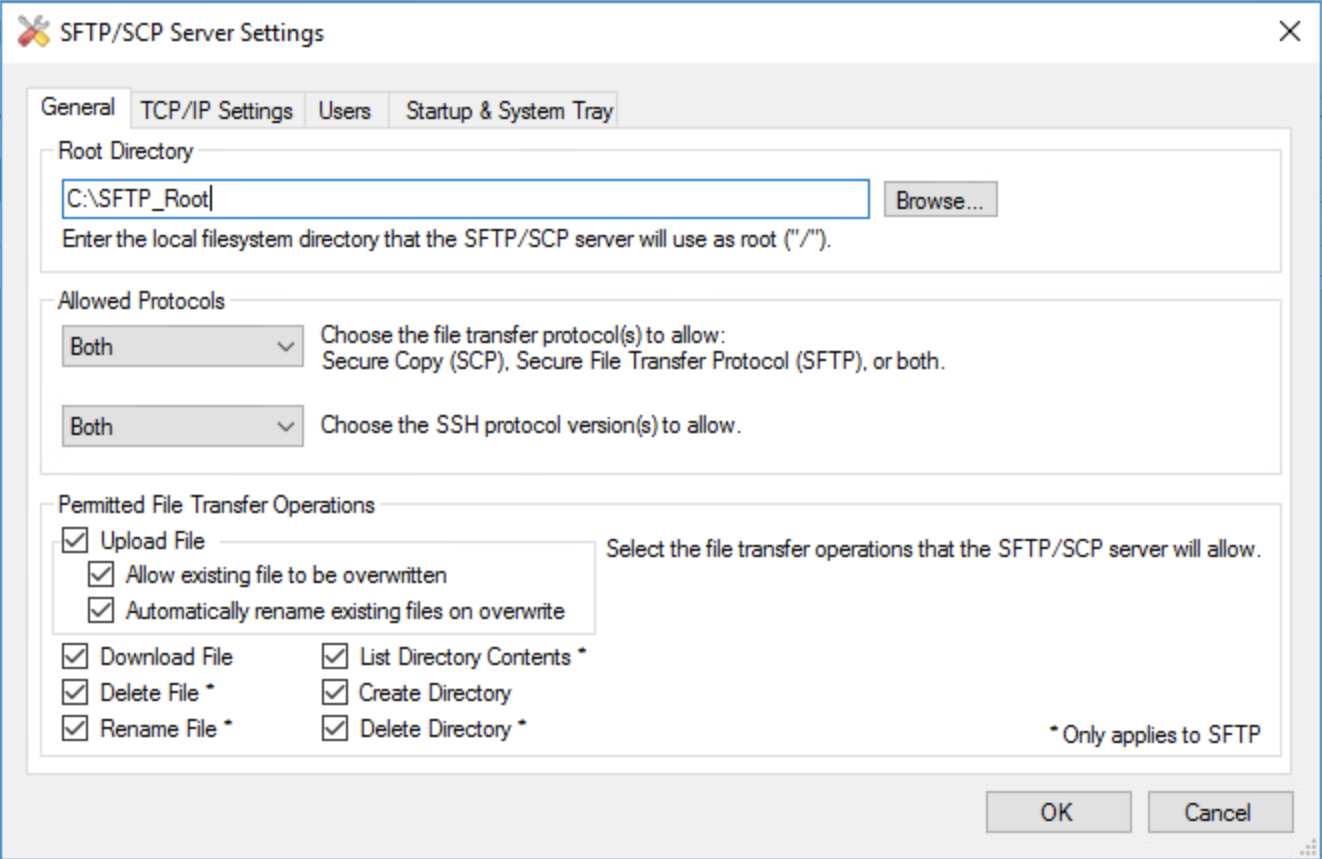
Install the SCP server using all of the default options and then open up the app. Along the top settings bar there is a File menu, open this up and then click on Configure.
We’ll need to specify a root directory that the SCP server will use. In my case this has been set to C:\SFTP_Root
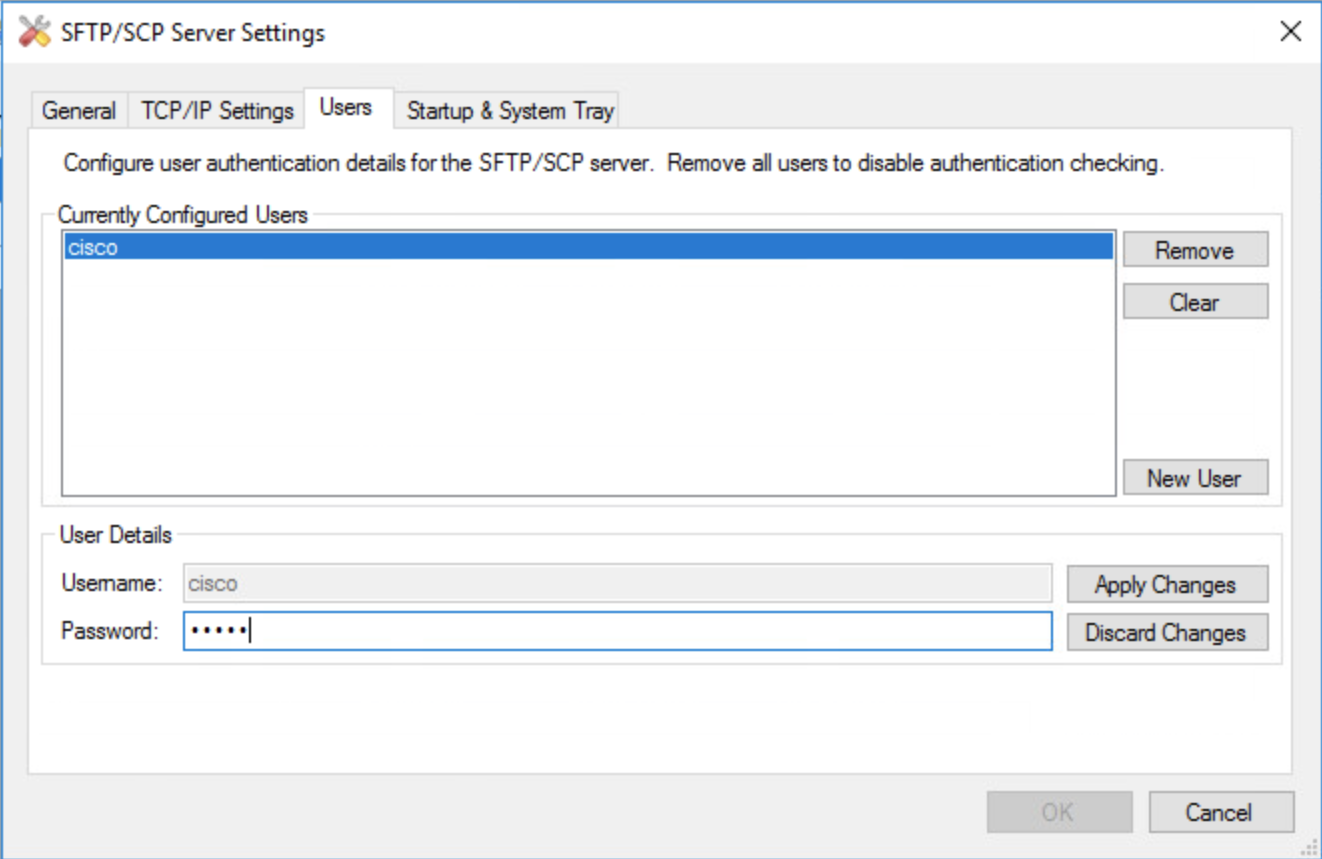
Now browse to the ‘users’ page and create a new account for our device. You can do this by clicking ‘new user’ and then populating the username and password field. Don’t forget to apply changes once you’re done.
We’re now ready to upload a firmware image to our Nexus device and start the upgrade.
The Update Process
First we’ll need a suitable NX-OS image to update to. You can find the version of NX-OS running on your device by running the command “show version”.
It should output something similar to below:
|
|
My device wa running version 9.5.0 which is behind the latest release of 9.5.2. So I went onto the website I mentioned earlier in this post and downloaded the following images:
- n5000-uk9-kickstart.5.2.1.N1.9a.bin
- n5000-uk9.5.2.1.N1.9a.bin
These images should then be put into the directory we created at the end of the last step. In my case this is the C:\SFTP_Root directory on my SCP server.
I then connected to my switch via ssh and copied the files to the Nexus’s local storage with the following commands:
|
|
The command structure is as follows:
|
|
Give the file transfer some time to complete. The on-board flash memory can be a little slow on some devices. You should see something similar to this during the upload:

Once the transfer completes it will bring you back to the command line.
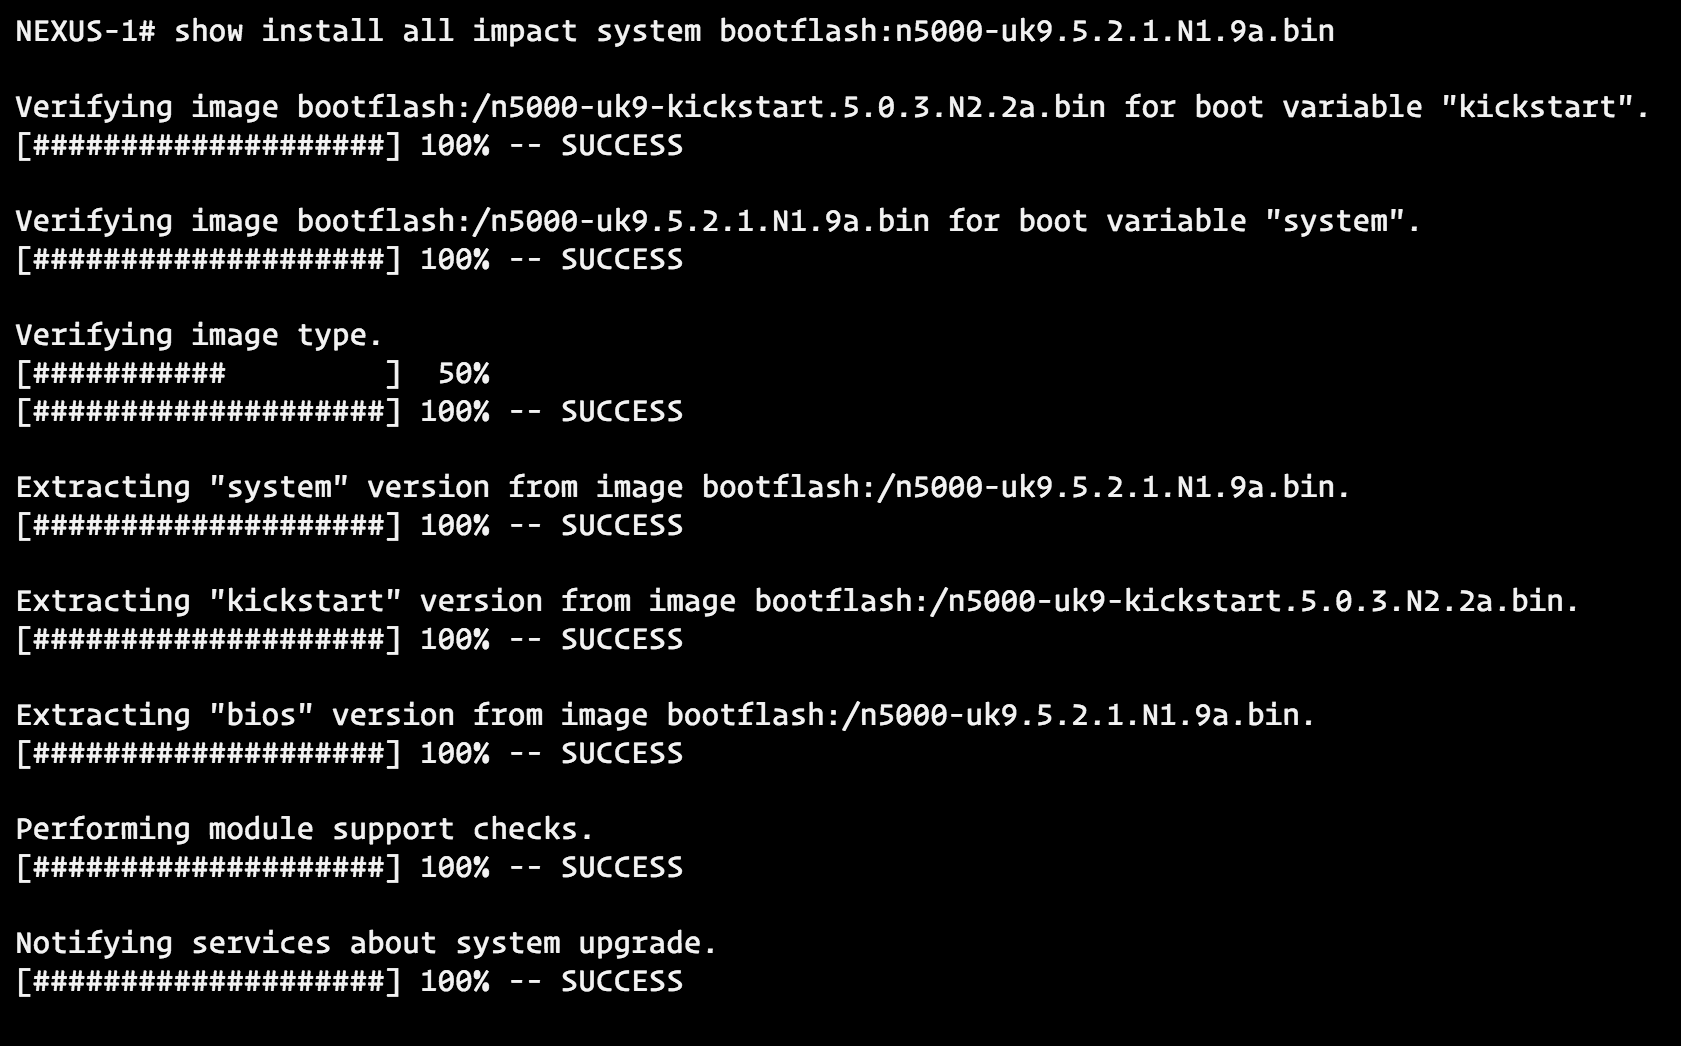
The next step is to check for any issues prior to the upgrade. Run the command:
|
|
If everything comes back as a success (as per below) then we’re good to proceed.
We will now run the final upgrade command which is as follows:
install all system bootflash:firmware.bin kickstart bootflash:firmware-kickstart.bin
So in the case of my device specifically the command is:
|
|
That’s it! Give your device about 5-10 minutes to finish the update and then log back in. Running the “show version” command should show the new firmware installed.
If an error is shown during the ‘impact’ pre-update checks or during the upgrade itself try a ‘leap frog’ update approach. Sometimes devices will throw an error if the firmware you’re trying to update to is considerably newer. I’ve found that updating to the latest NX-OS of each major version works quite well (e.g. 5.0.X to 5.1.X to 5.2.X).
Comments