How to Enable PowerShell Transcript Logging

Since its release in 2008 PowerShell has quickly become one of the most powerful system administration tools for Windows. The modern cmdlet’s offer more functionality than its cmd predecessor, however this has sometimes been exploited by nefarious actors to perform attacks and bypass traditional security measures.
In this post I’ll be covering the steps necessary to setup PowerShell transcript logging to a networked file share.
Step 1 – Create a file share
PowerShell is going to need somewhere to save the transcript log files. For this, I’ve created a ‘Logs’ folder on my Lab Windows Server DFS file server.
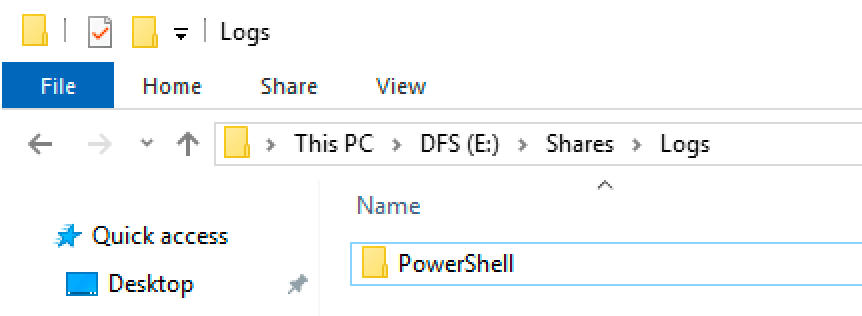
New ‘Logs’ share created on a Windows Server
It’s important that the correct NTFS and share permissions are set to avoid the files being altered or compromised in any way. Set the share permissions to allow all users full control as shown:
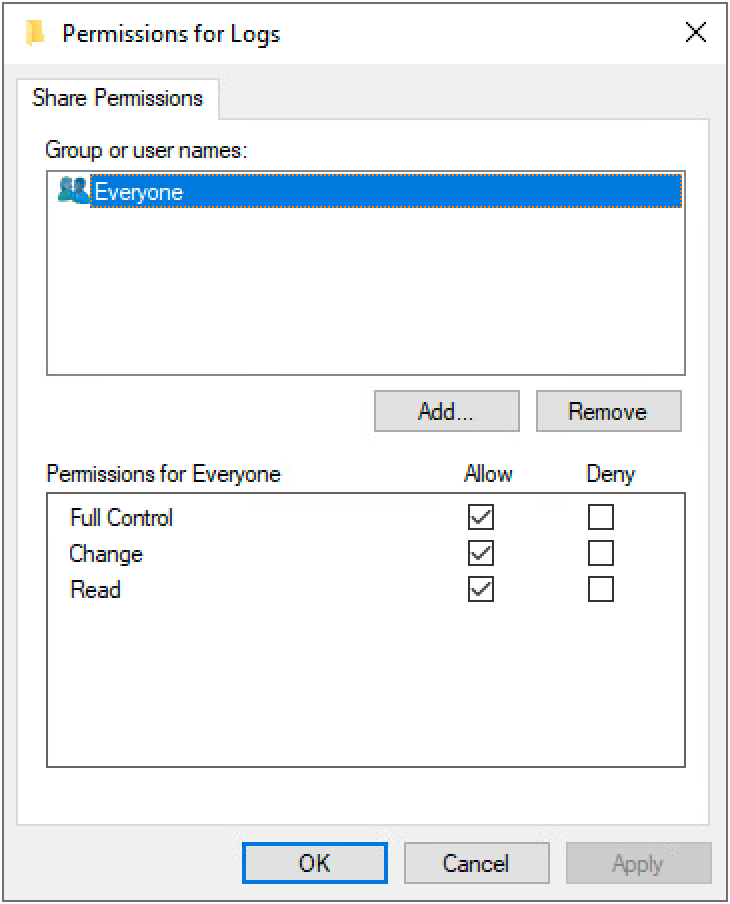
Setting the share permissions to full control
Now navigate to the NTFS advanced permissions page. Use the ‘Disable inheritance’ button to remove all existing permissions and then configure the permissions like so:
Domain Users – Write access only
CREATOR OWNER – Write access only
Administrators – Full control
You should end up with something looking like this:
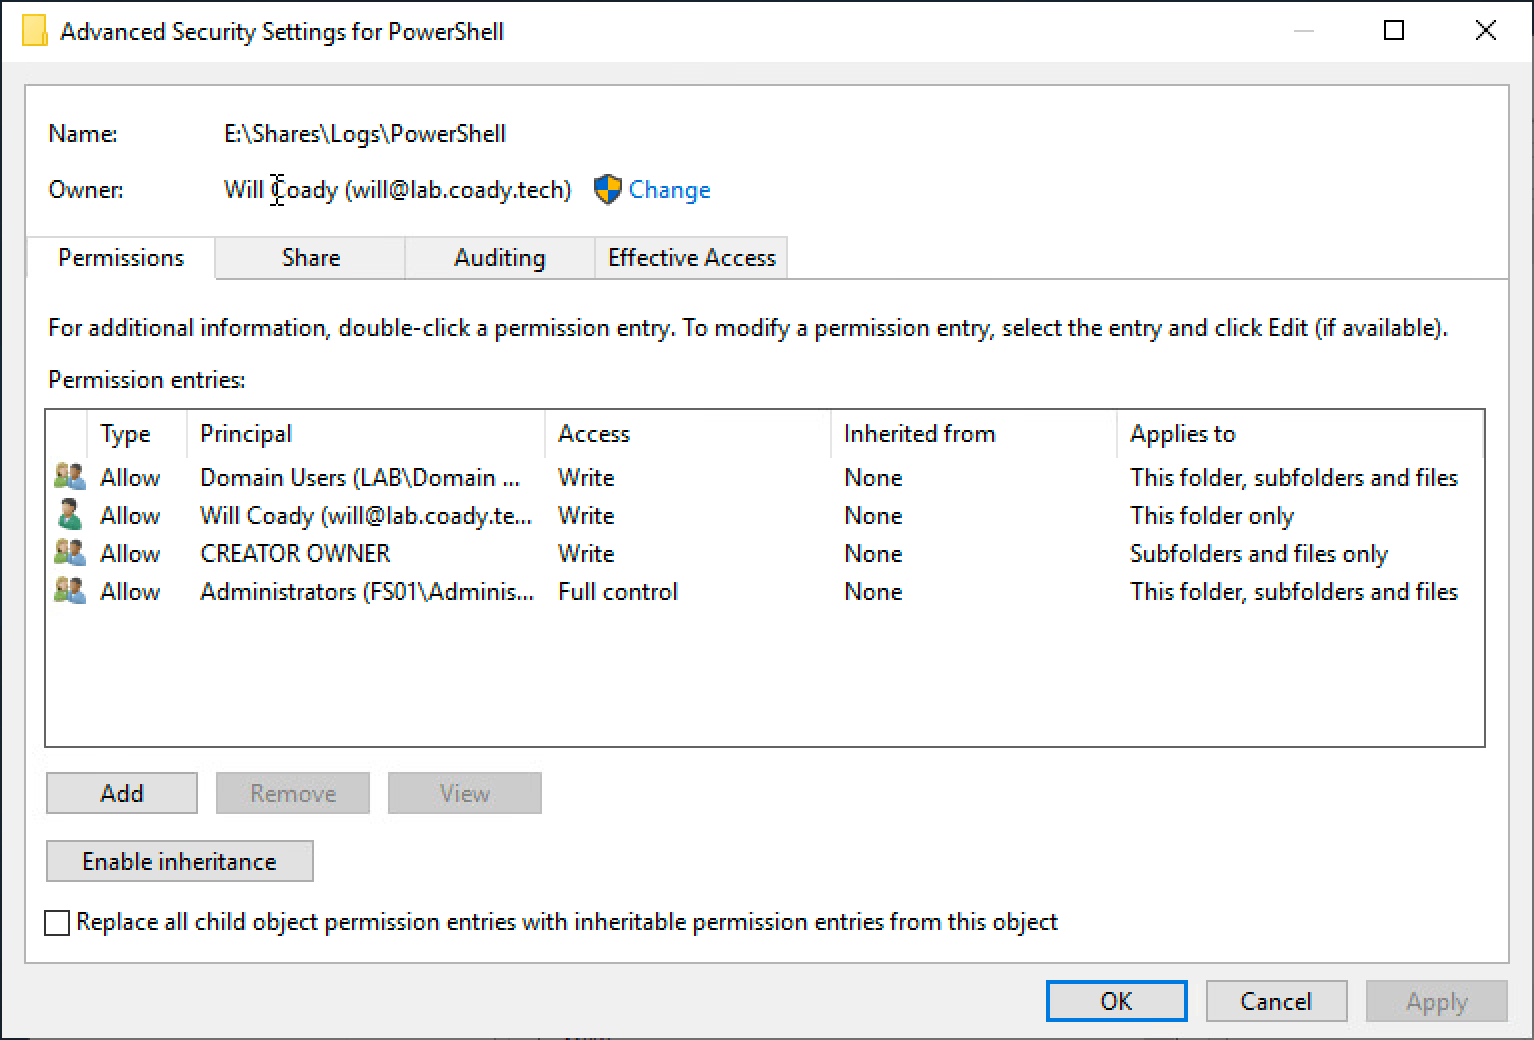
Ensure your NTFS permissions match this
Step 2 – Configure group policy
Create a new Group Policy targeted at an OU containing the computers that you wish to enable PowerShell logging on. In this example I’ll be linking the new GPO at the root of my domain.
Browse to:
Computer Configuration > Policies > Administrative Templates > Windows Components > Windows PowerShell
Configure the policy Turn on PowerShell Transcription.
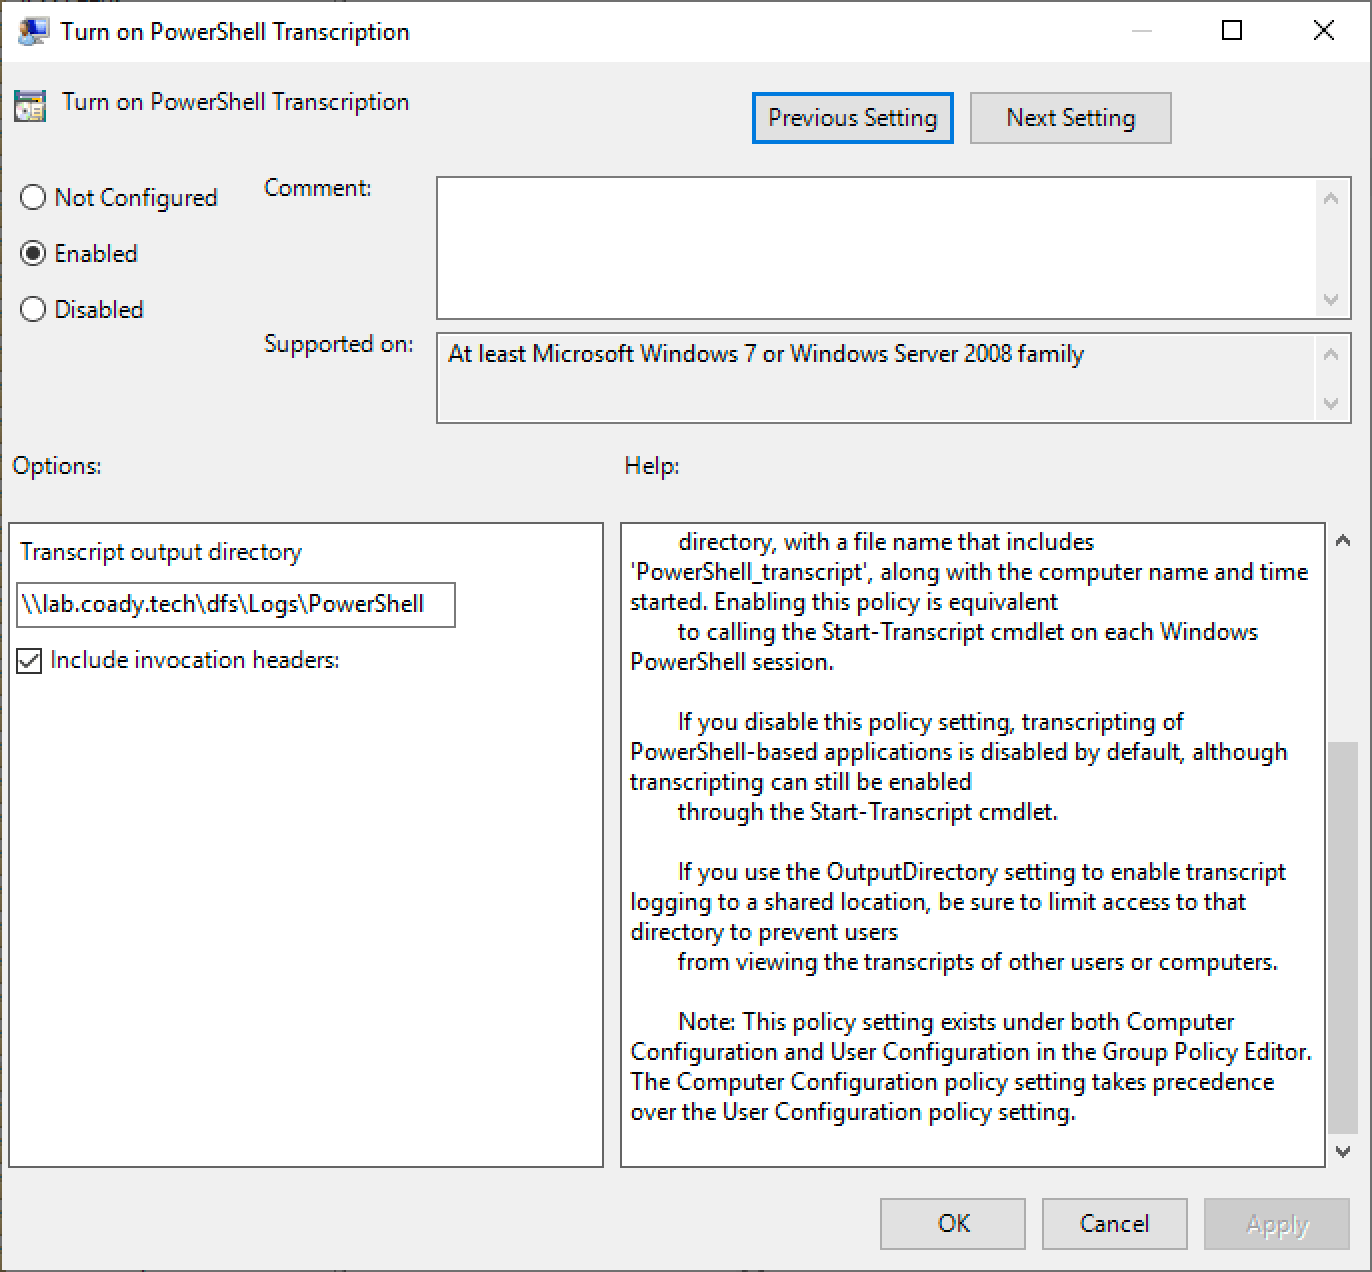
Enabling the Group Policy
As per my example above, fill out the ‘transcript output directory’ with a UNC path to your network file share.
Step 3 – Test
Now it’s time to see if the logging is actually working.
On a Windows computer where the new GPO has been applied, launch PowerShell and run a couple of commands. I’ve run “Get-Date”.
Browse back to the file share which we configured in step 1. If everything has worked correctly there should be a new folder representing the date of a PowerShell session. It’s named back to front so in my example below the folder is named “20200524”, meaning the folder contains all PowerShell transcript logged on the 24th of May 2020.
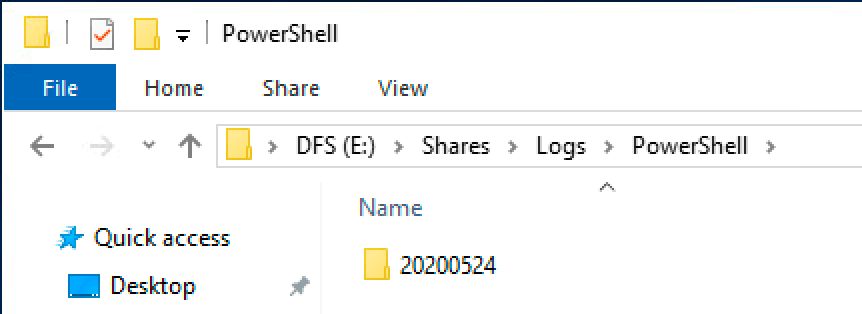
A new folder is created for each day’s PowerShell transcript logs
Within the folder should be a text file. Each individual PowerShell session will create an individual text file. Here’s an example from my test:
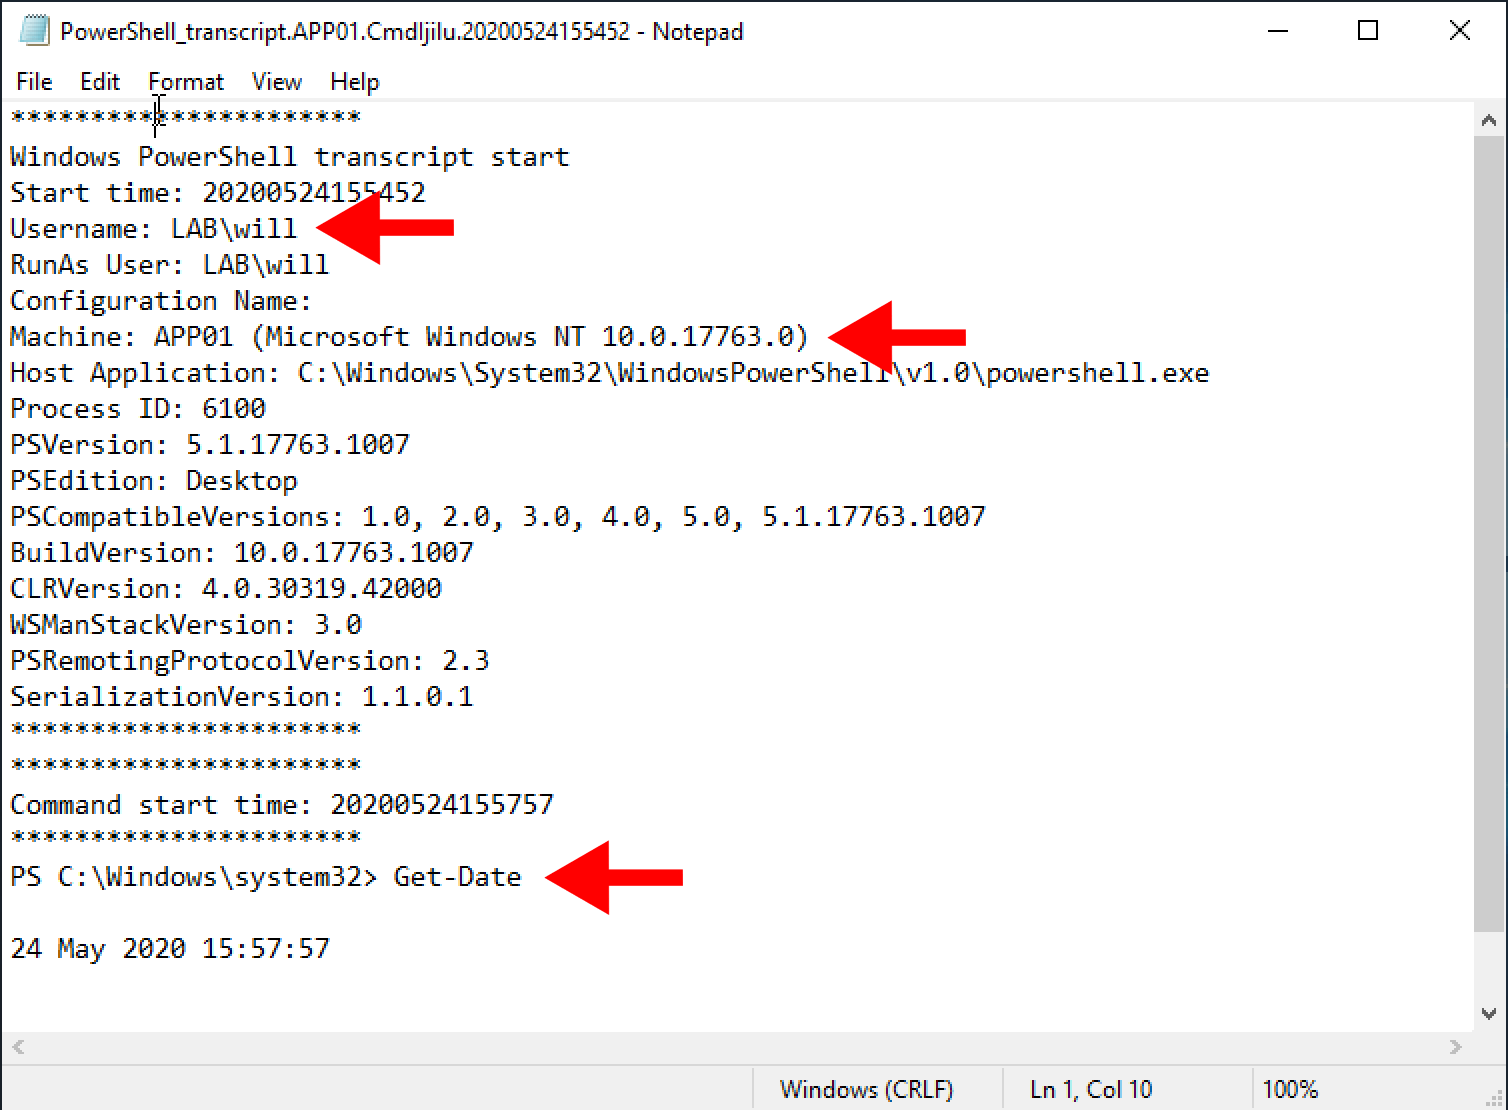
As you can see in the sections I’ve highlighted with the red arrows, the username, machine name and commands are all shown within the log.
Closing Thoughts
PowerShell Transcript logging is a fantastic way of keeping an audit trail within your environment. It’s both quick and easy to setup, and allows smaller organisations to start logging basic activity without having to invest in a full blown SIEM.
Please bear in mind that the system isn’t completely fool proof and could potentially be bypassed by someone that knows what they’re doing. In more secure environments this technology should be complemented with a separate SIEM product such as Microsoft Sentinel.
Let me know if you found this helpful and/or how you’re logging PowerShell in the comment section below. Thanks!
Comments