How to setup vSphere encryption

With the release of vSphere 6.5 VMware have drastically improved the state of vSphere security by implementing new features such as VM-level disk encryption, encrypted vMotion and support for the new secure boot model. Unfortunately, unlike Microsoft’s Hyper-V, VMware took the path of relying upon an entirely separate key management system for the storing of encryption keys.
In this guide I’m going to be showing you how to setup vSphere’s encryption features from scratch, suitable key management solutions, and my personal recommendations.
The KMS
The KMS or ‘Key Management Server’ is as the name implies used to store encryption keys. They come in the form of both hardware and software appliances which run completely separately from vSphere. Once a virtual machine is encrypted, vSphere needs somewhere to save the decryption key and for that it uses the KMS.
At the time of writing VMware officially supports the use of 12 KMS products with vSphere. Some of these products are:
- HyTrust KeyControl
- Thales eSecurity Vormetric Data Security Manager
- Gemalto SafeNet KeySecure
- IBM Security Key Lifecycle Manager
- QuintessenceLabs qCrypt 200V
- Dell EMC Cloudlink
Generally speaking, any KMIP compliant system should be compatible with vSphere. Most modern Hardware Security Module’s (HSM) support KMIP if you do happen to have one. The above list is of products which have been specifically tested and certified by VMware.
Choosing a KMS
For this particular how-to guide I’m going to be using HyTrust’s KeyControl. This is partly because up until very recently the product was free to use, and because HyTrust offer a 60 day downloadable free trial on their website.
It’s worth nothing that most products on VMware’s certified list are not exactly cheap. From my limited research most seem to cost in the region of approx £7500 / $10,000 USD or more.
For those looking to test encryption within a lab environment I’d highly recommend HyTrust. It’s a real commercial product that’s both stable and reliable. Otherwise take a look at the free open source PyKMIP project. It’s a community driven effort to build a KMS in the python programming language.
Step 1 – Deploy the virtual KMS appliance
Within vCenter right-click on your cluster and then select Deploy OVF Template.

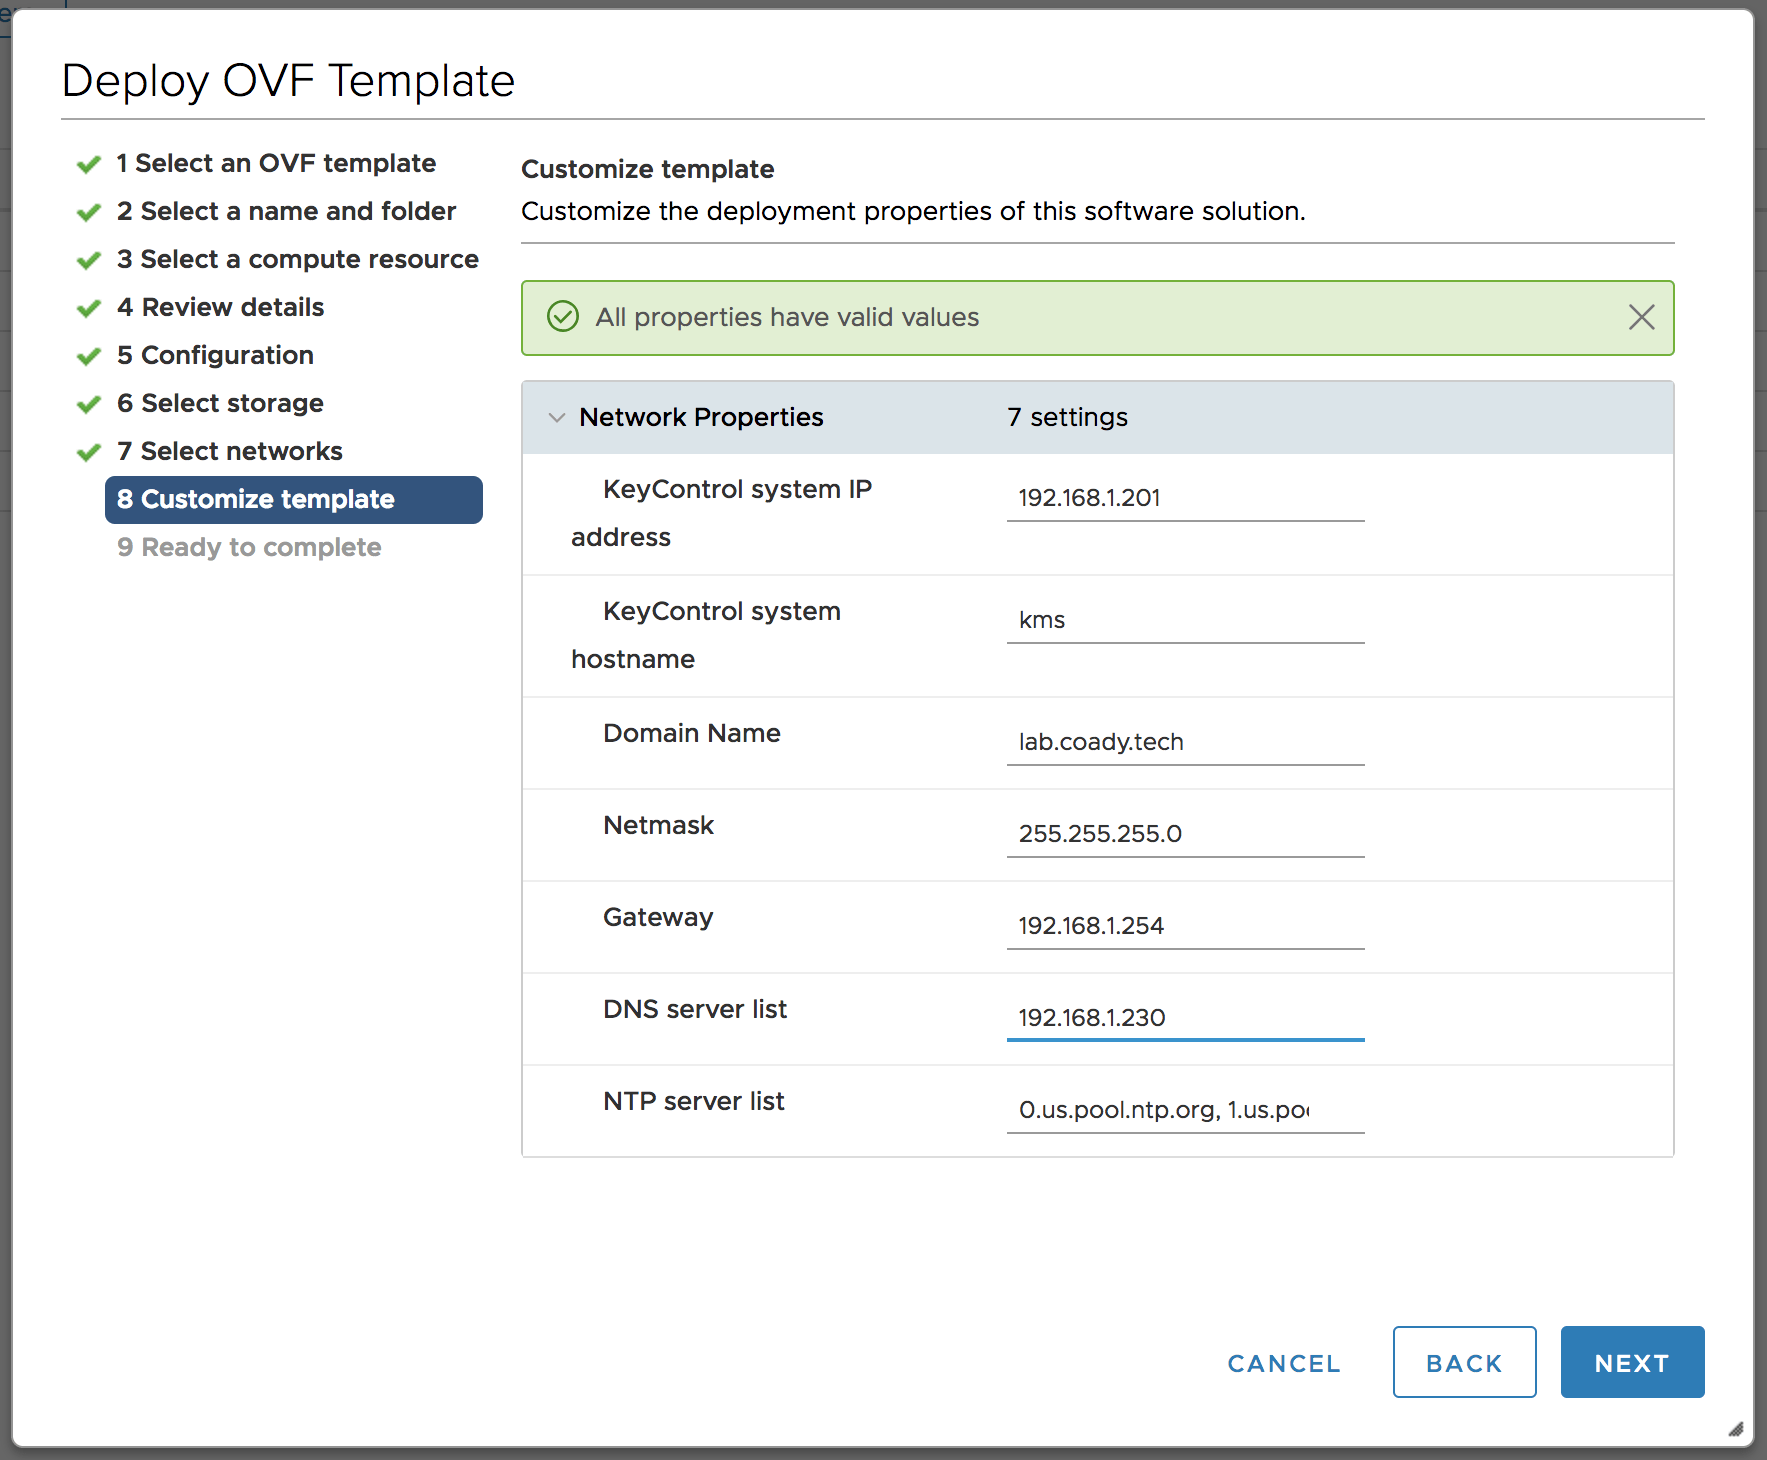
A wizard will launch to guide you through the installation process. The steps are quite self-explanatory. For the configuration option I selected ‘Demo’ due to the lower 1GB RAM requirement.
When prompted, provide the KMS system with a static IP address, hostname and DNS server address.
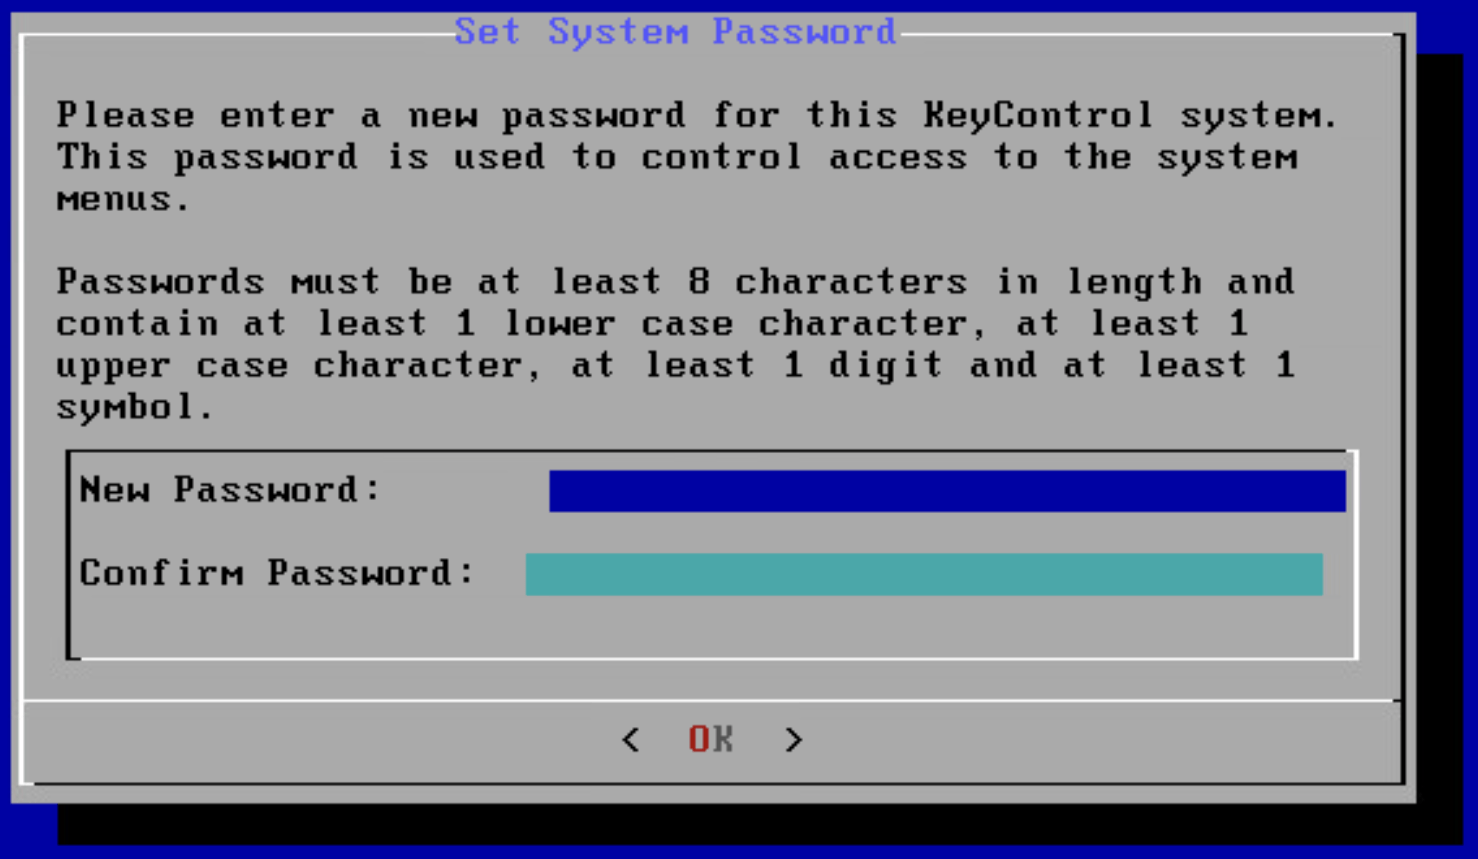
Boot up the newly deployed KMS appliance and connect to the console. Once the system has booted you’ll be prompted to set a password as shown below.
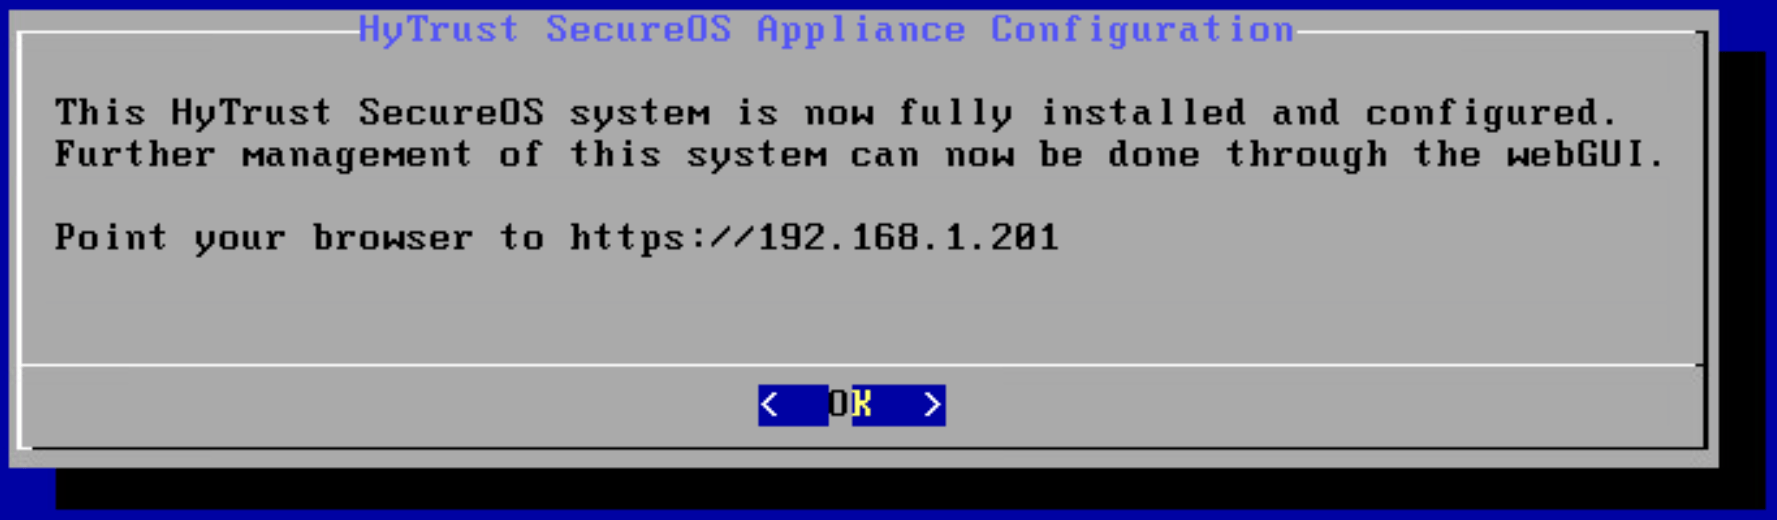
After this confirm the KMS’s details and select No when asked if the system is part of an existing cluster.
You will now be shown the IP address of the KMS.
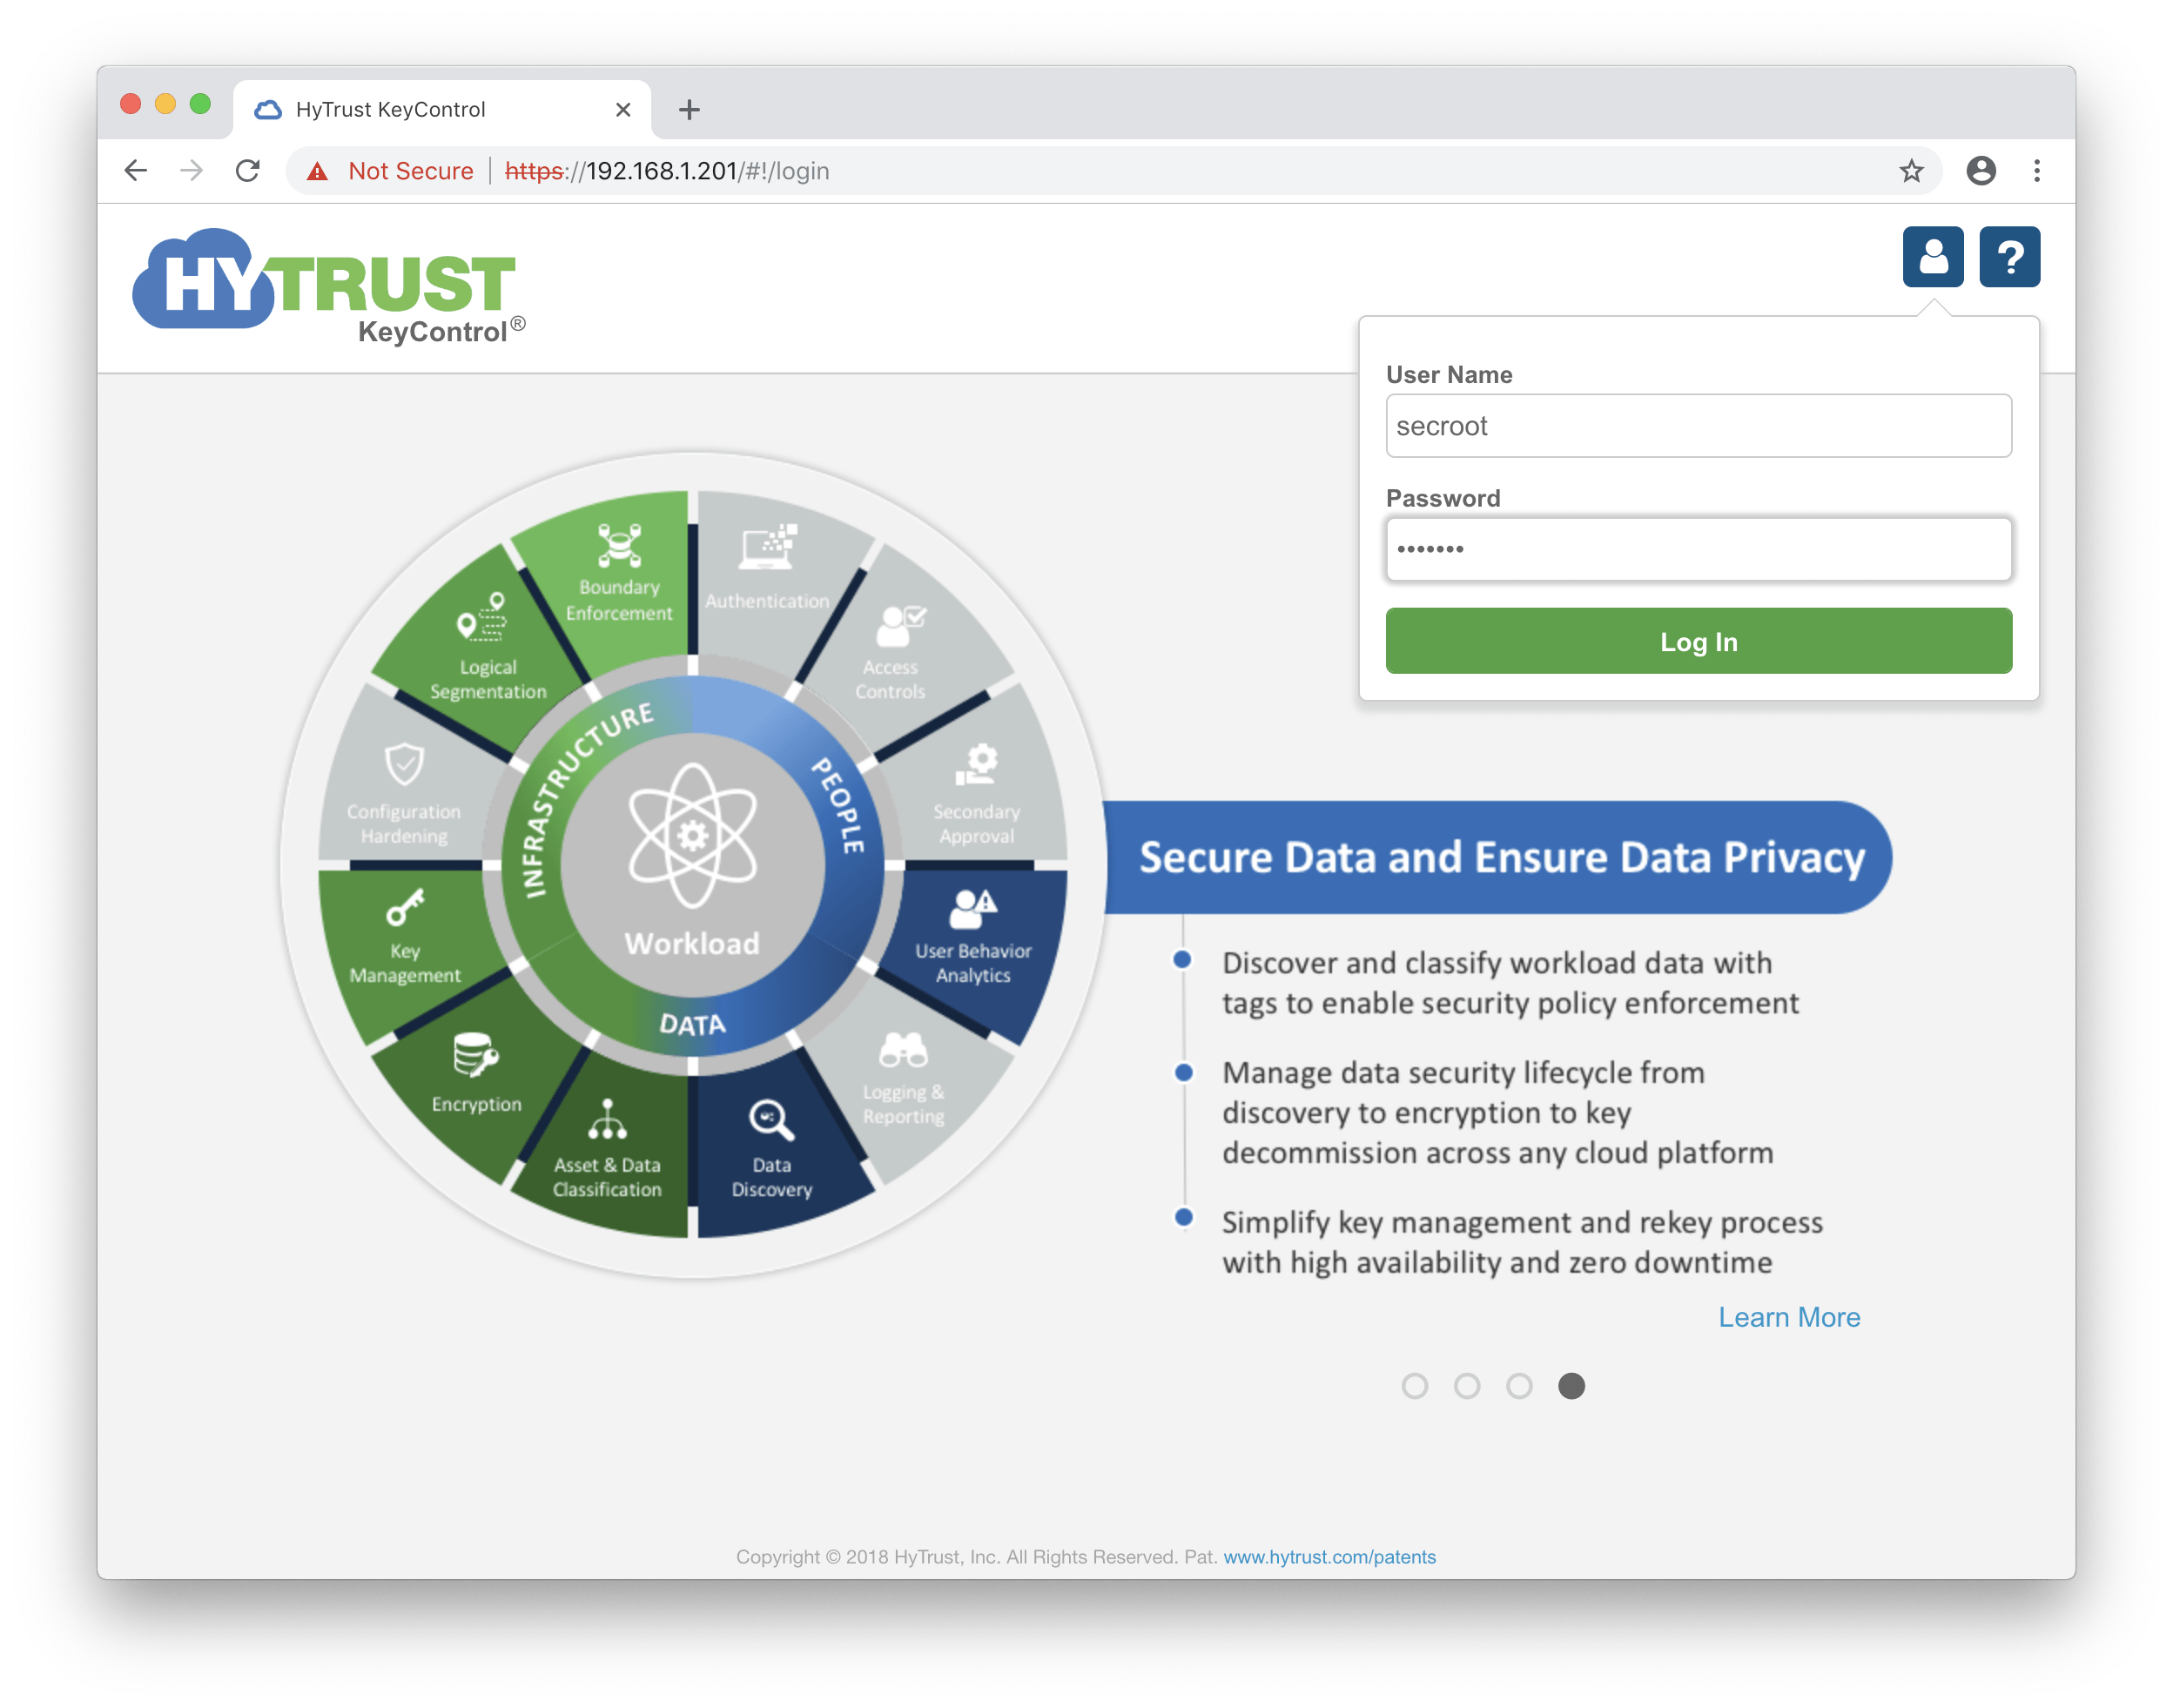
Step 2 – KMS Setup
Open a browser and go to the IP address from the last step. The default username and password is secroot.
You’ll be asked to choose a new password and to enable email notifications. Enter in a secure password and then skip the email setup by ticking Disable e-mail notifications.
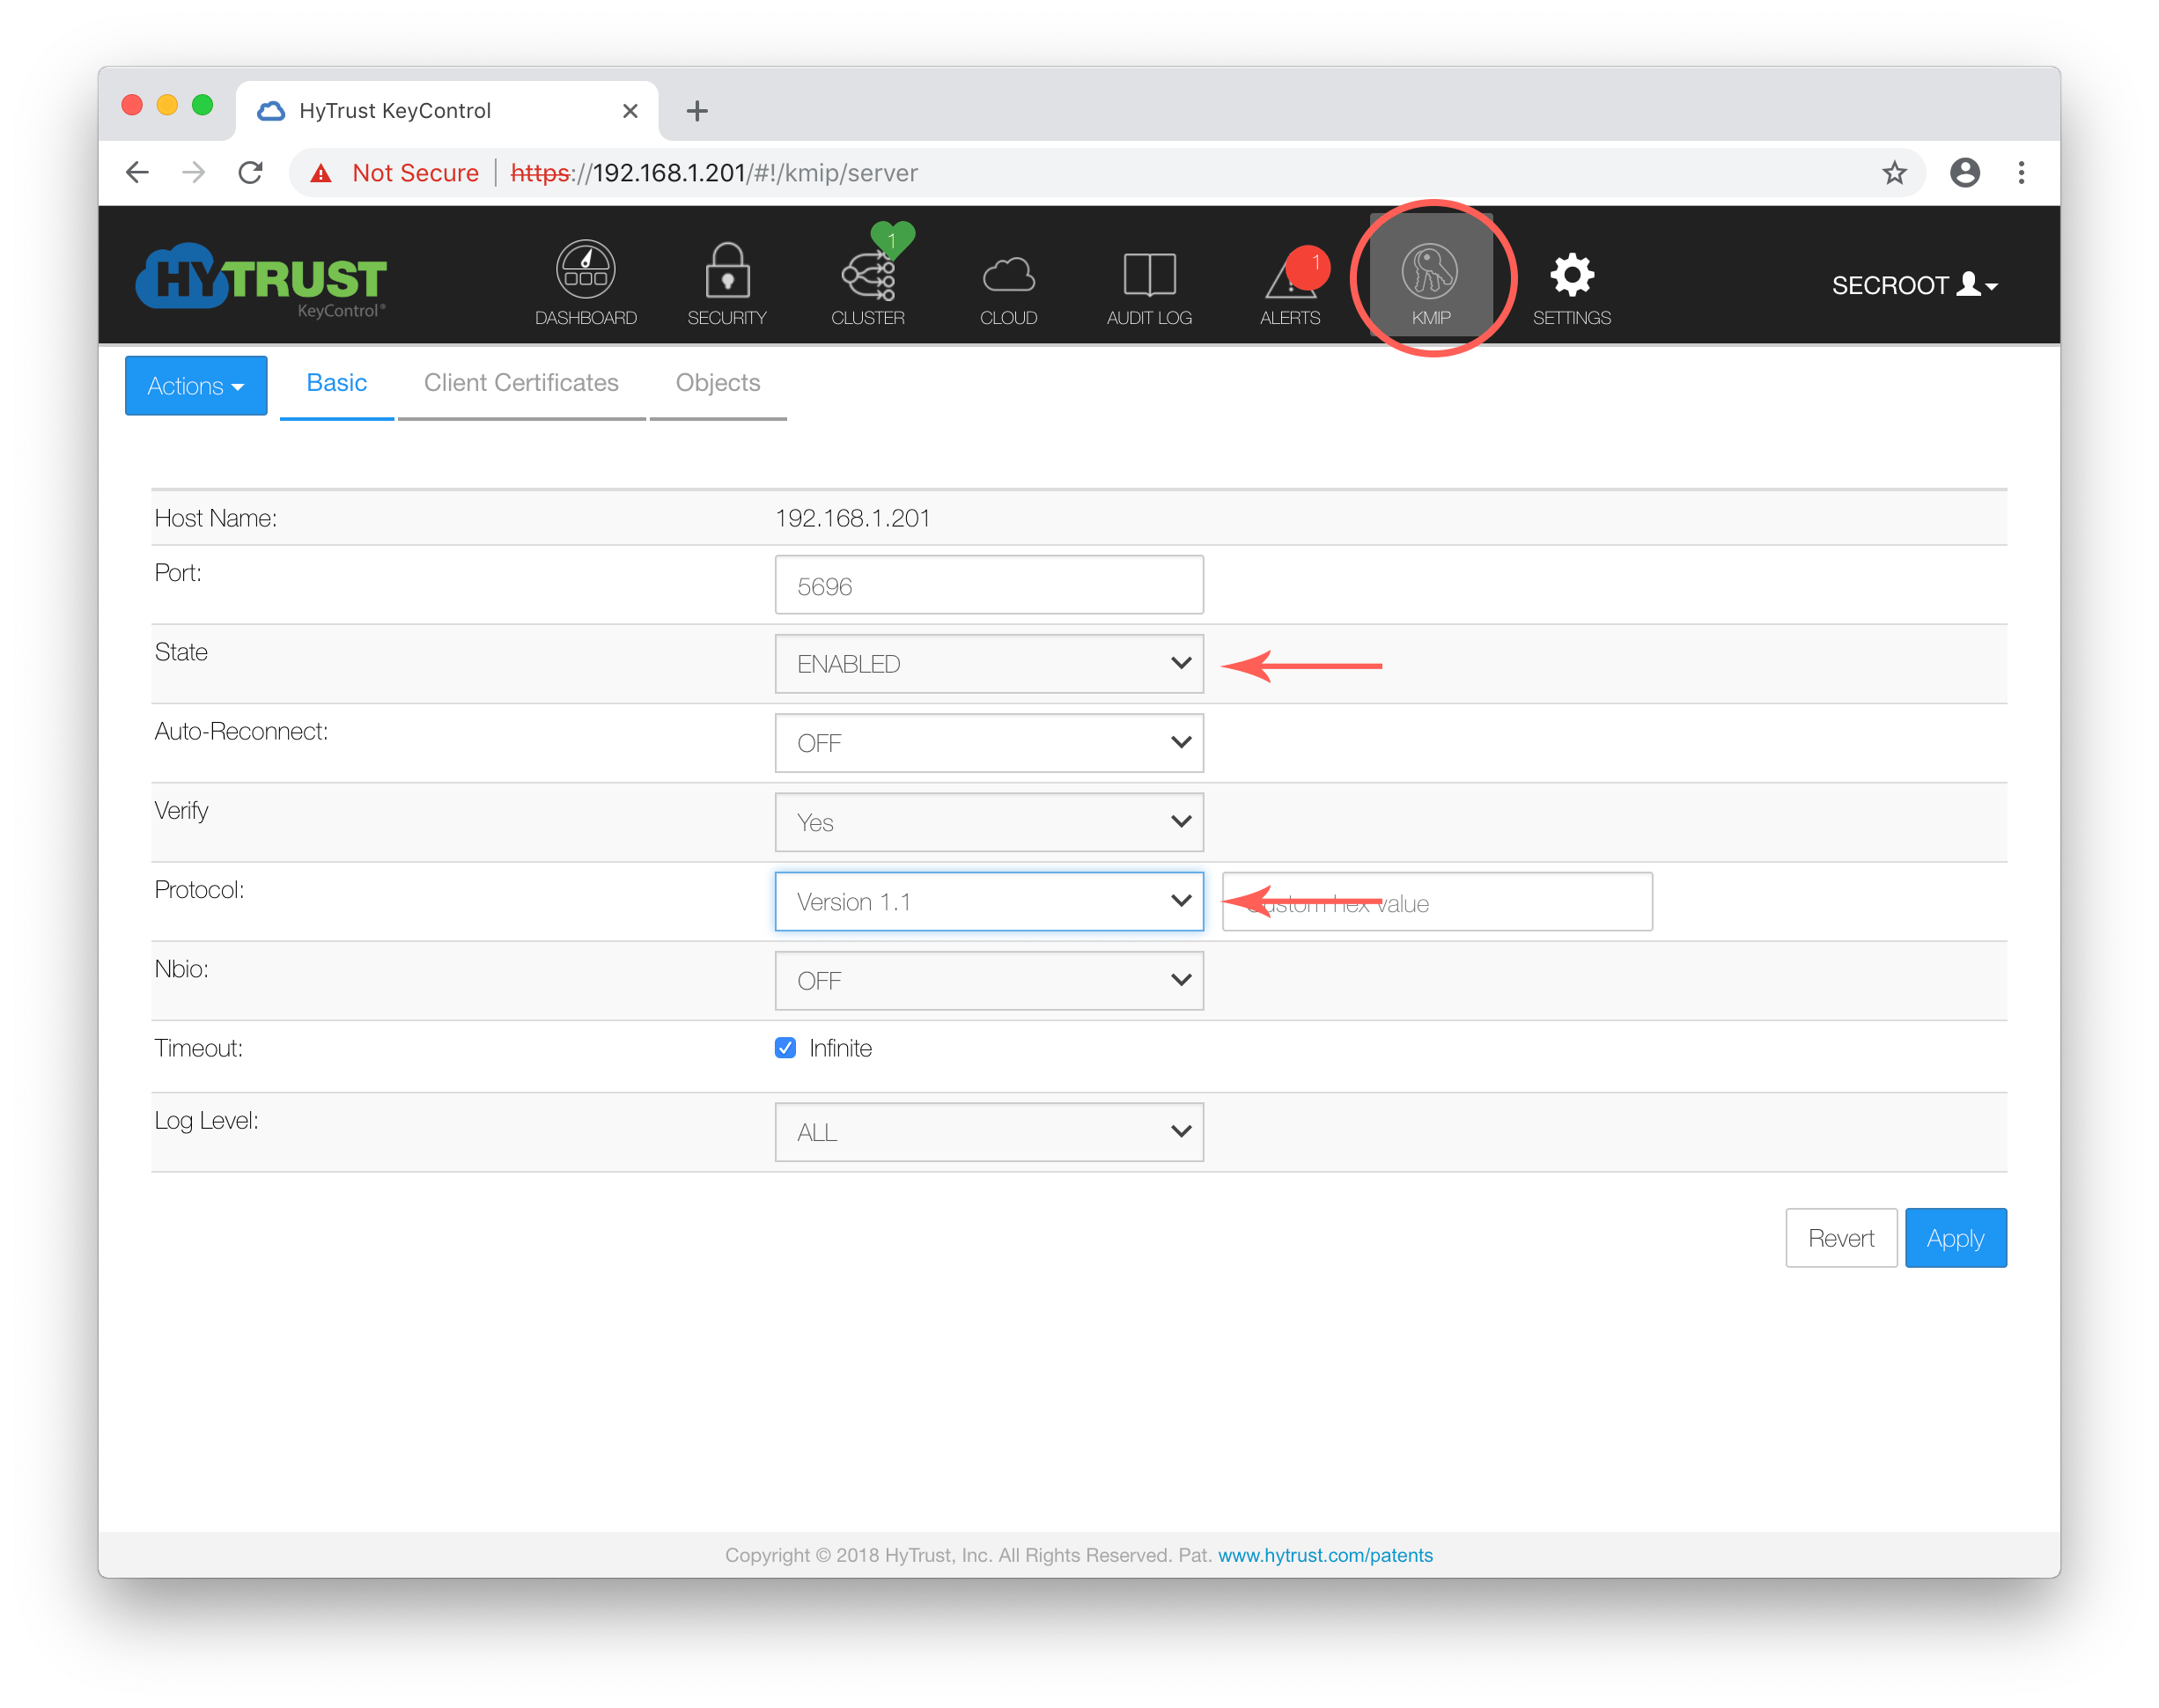
Once logged into KeyControl, select KMIP in the menu bar.
Here we need to change the state to enabled and the protocol to version 1.1. Once done click Apply.
Now, still within the KMIP options, open the Client Certificates sub-heading. Select the blue Actions button and create a new certificate.
Enter in a suitable name and expiry date for the certificate and then click create. Do not specify a password as vSphere does not support this.
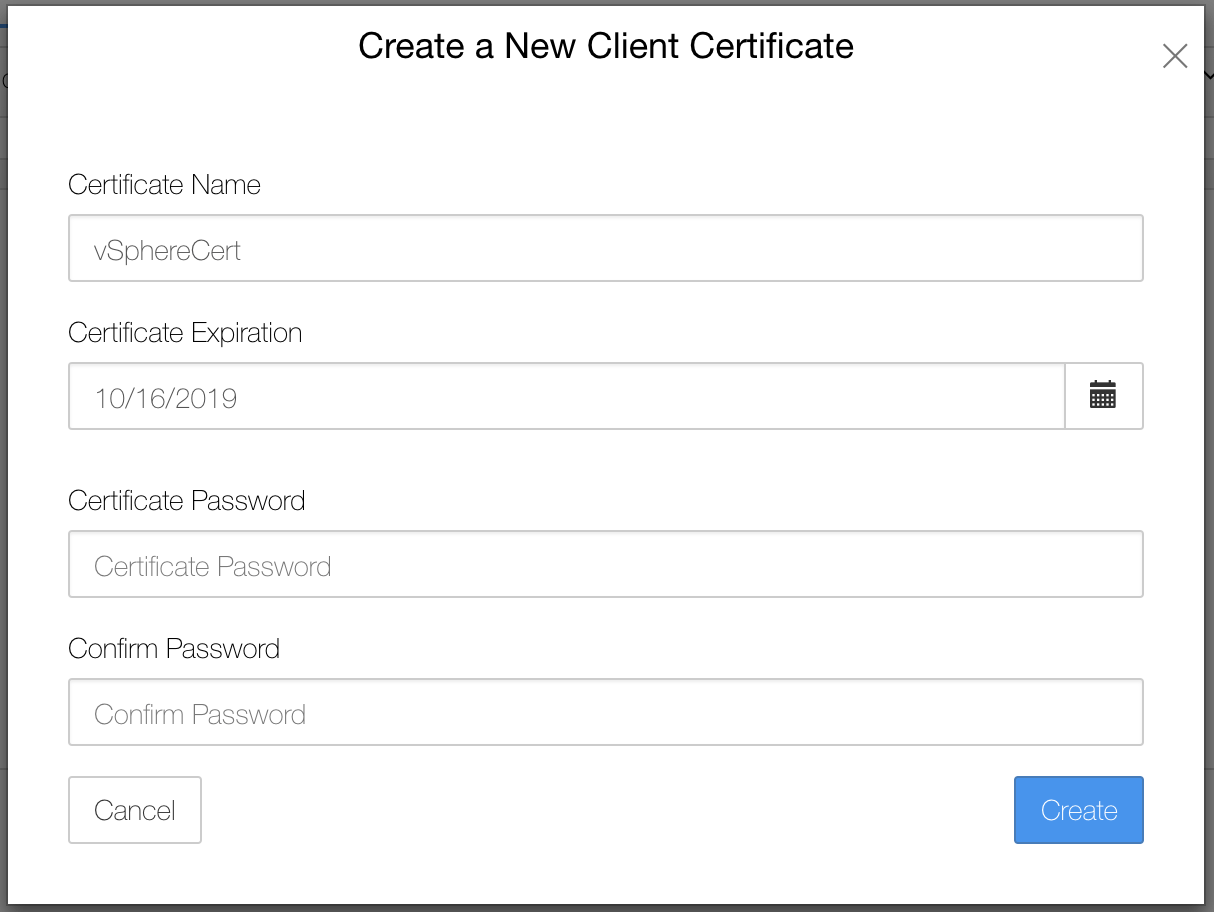
Provide the certificate with a relevant name. I’ve used ‘vSphereCert’.
Finally, on the client certificates page select the certificate that you just created and use the Download Certificate option within the blue action menu to download the .PEM files. We will need to use these files in the next step.
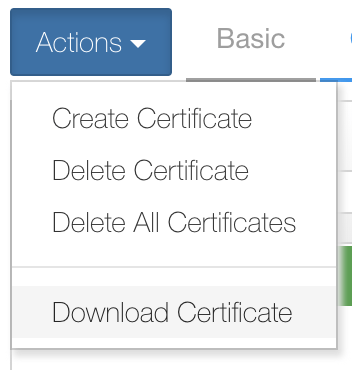
Use the Actions menu to download the recently created certificate files.
We’re now done setting up HyTrust KeyControl! Onto vCenter for the next stage of setup.
Step 3 – vSphere Setup
In this step we’ll login to vCenter and setup a secure two-way trust between vSphere and the KMS. Once this trust has been established the full suite of vSphere encryption features will become available.
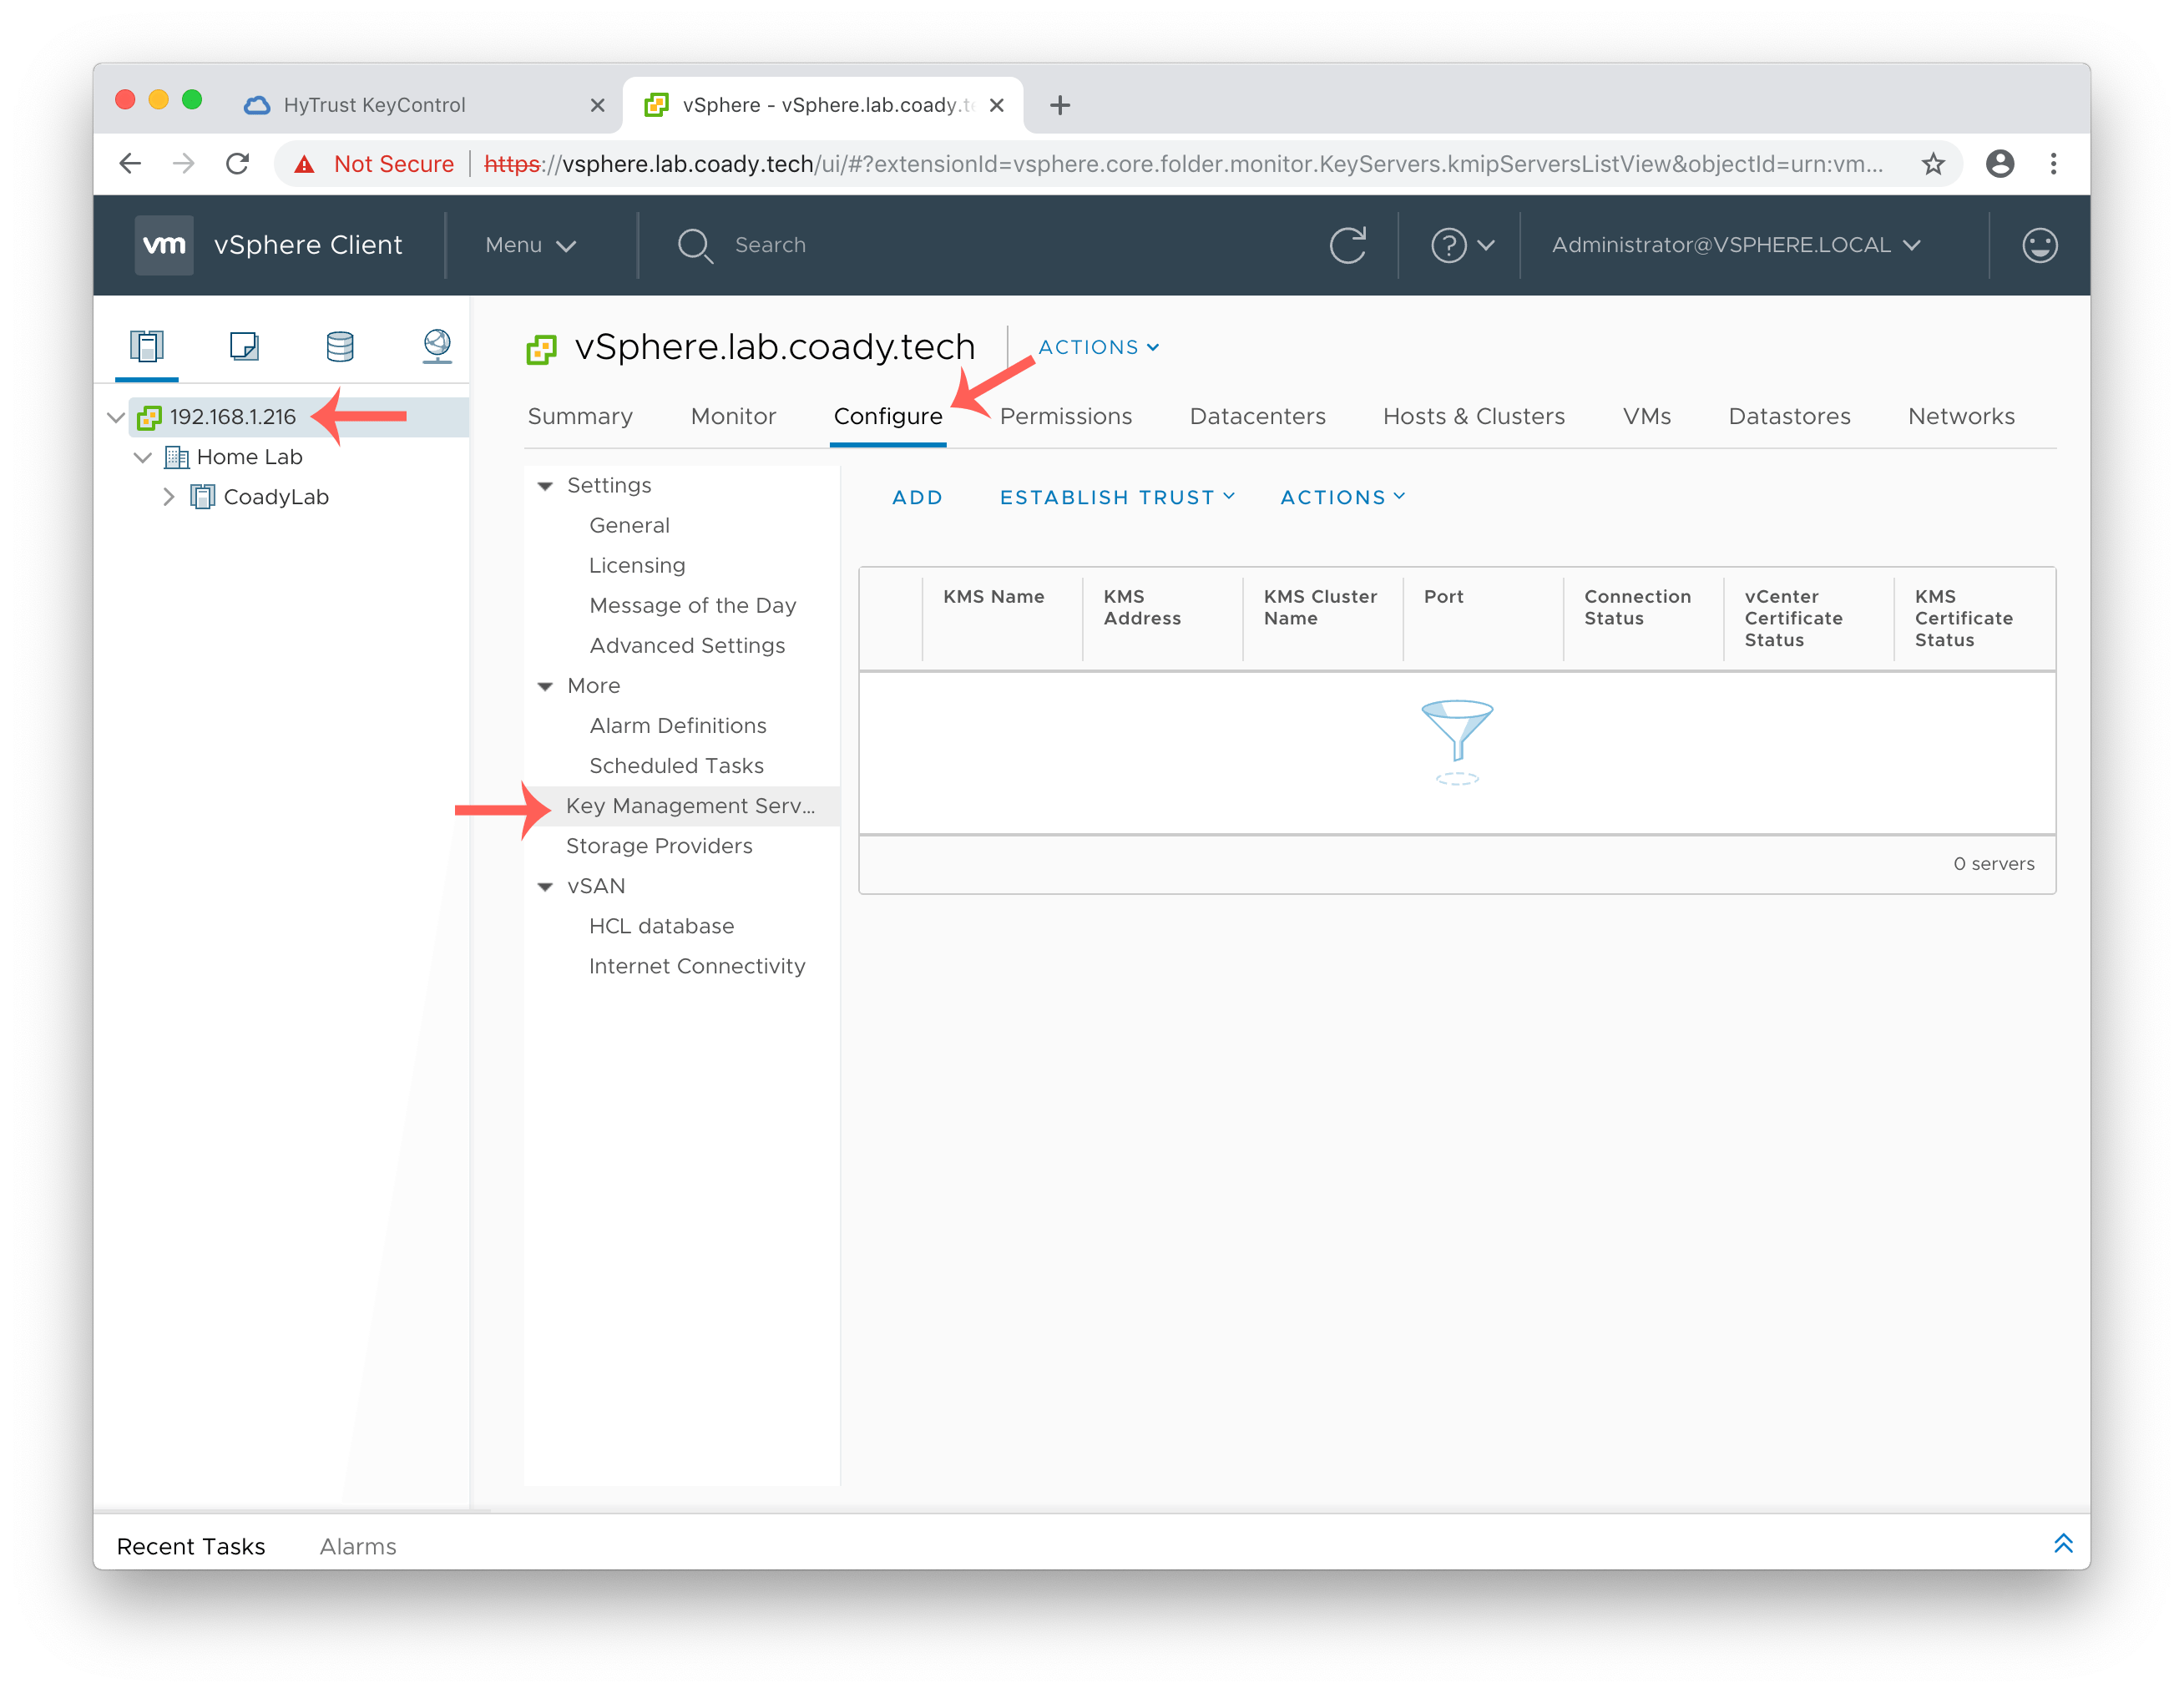
Within the HTML interface select the vCenter server from the left-hand menu (the top item in the list), select configure, and then Key Management Servers. I have highlighted each of the steps in the screenshot below.
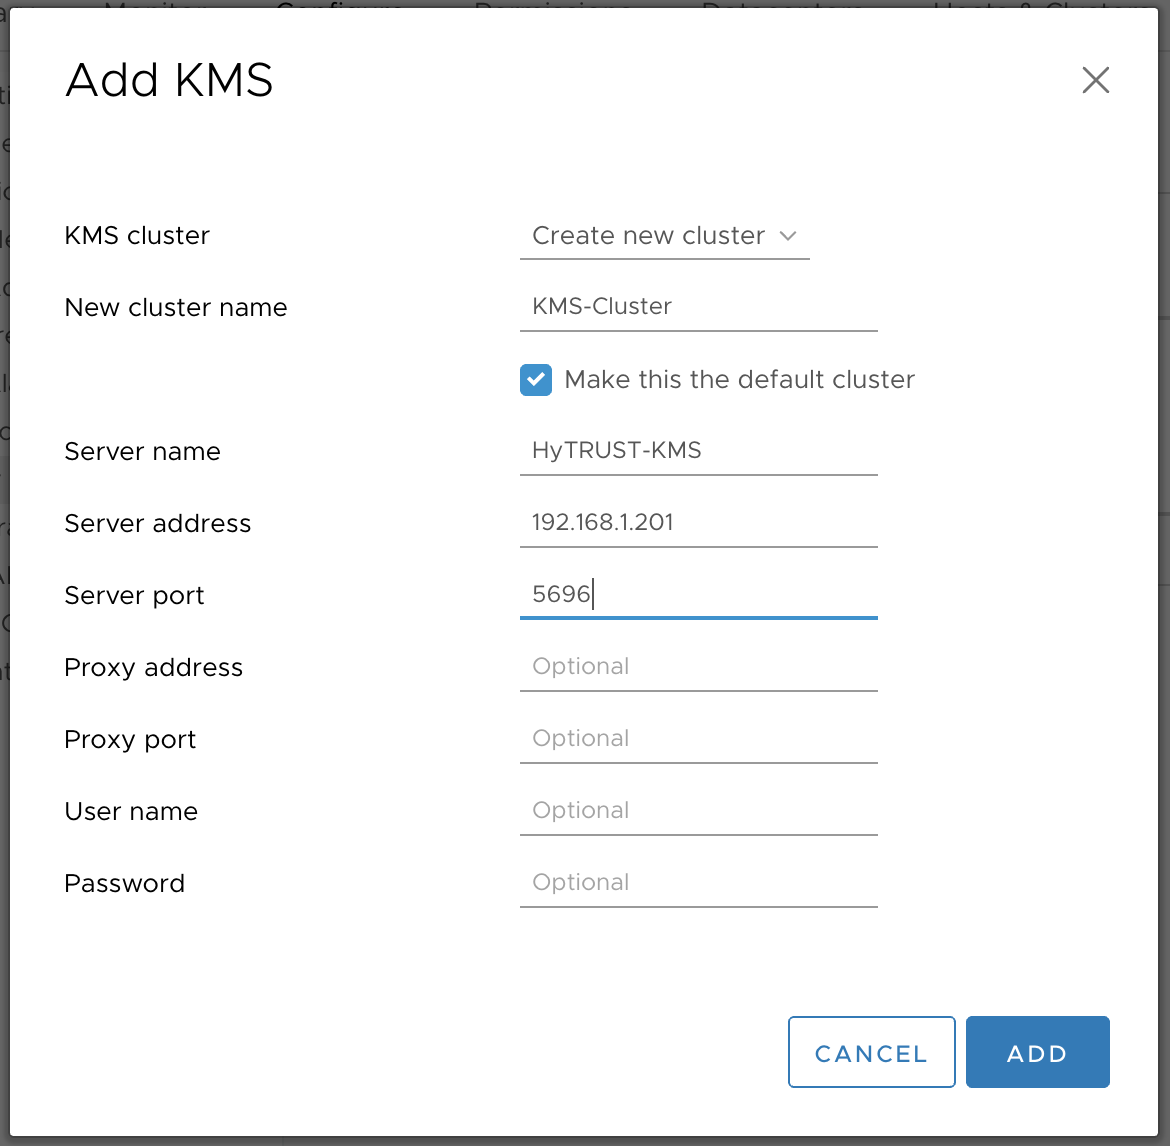
Now on the KMS settings page click Add and fill in the details of the HyTRUST KeyControl appliance.
The cluster and server name are purely cosmetic and can be set to anything you like. Make sure you enter the correct IP address under server address and set the server port to 5696. Leave the rest of the fields empty. Once done select add.
A prompt will be shown asking if you trust certificate of the KMS appliance. Select Trust.
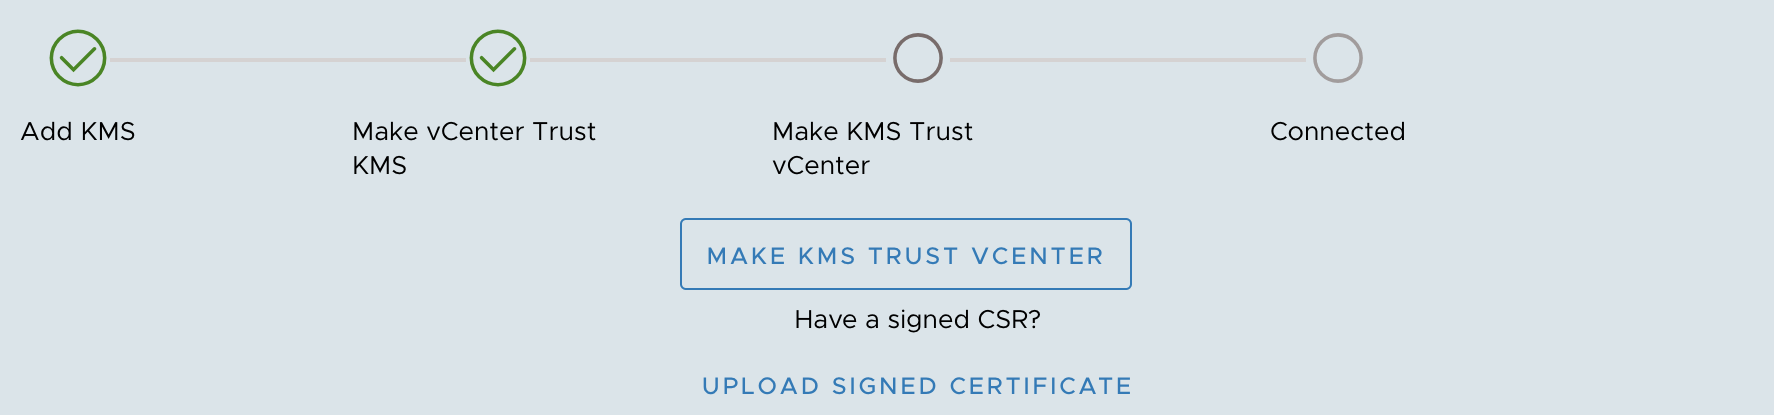
We must now configure the KMS to trust vCenter by uploading the certificate file downloaded in step 2. Within vCenter click on the newly added KMS so it is highlighted and select Make KMS trust vCenter.
At the prompt select KMS certificate and private key and then click next.
You will now be asked to upload a KMS Certificate and a KMS Private Key file. This is the certificate we created back in step 2. Open the downloaded .ZIP file and you will see two .PEM files. Ignore the ‘cacert.pem’ file, instead use the .PEM file with the name you decided upon in step 2.
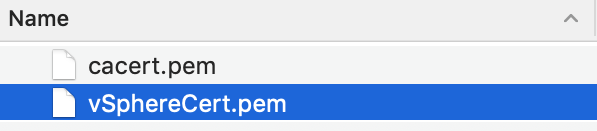
Choose the .PEM file with the name you specified. Ignore ‘cacert.pem’.
Upload the .PEM file twice (for each option). Your screen should look similar to this:
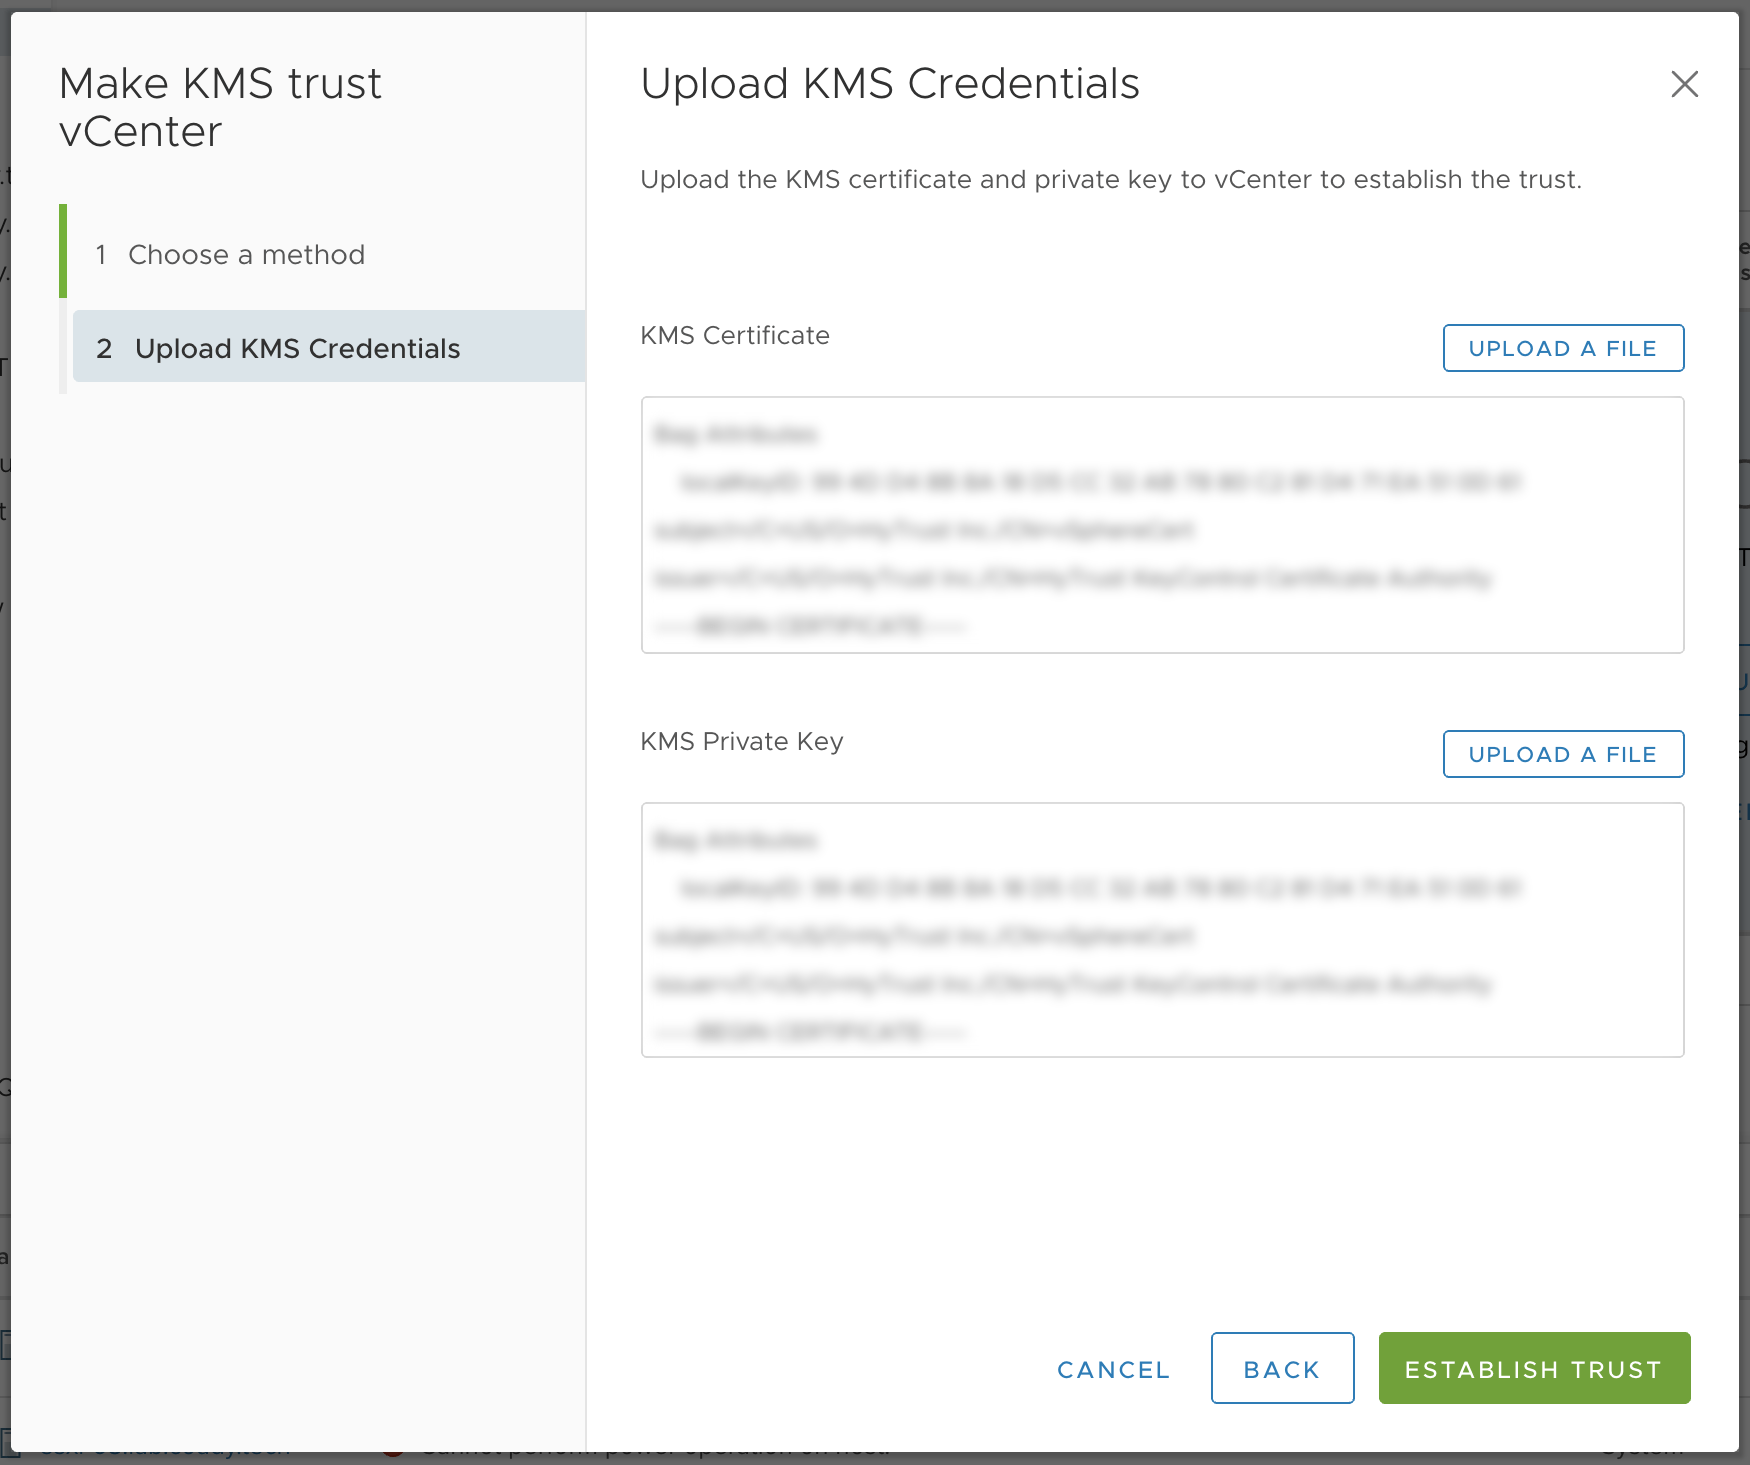
I have uploaded the same .PEM file twice.
Finally, click establish trust.
This completes step 3. vSphere is now setup to encrypt workloads and save the encryption keys to the KMS server.
Step 4 – Encrypting virtual machines
In this final step we’ll now actually encrypt a virtual machine.
Within vCenter right-click on a virtual machine that you intend to encrypt, expand VM Policies and then select Edit VM Storage Policies.

Edit the VM storage Policy.
Within the storage policy settings, select the drop-down menu (highlighted) and change this to VM Encryption Policy. Once done select OK.
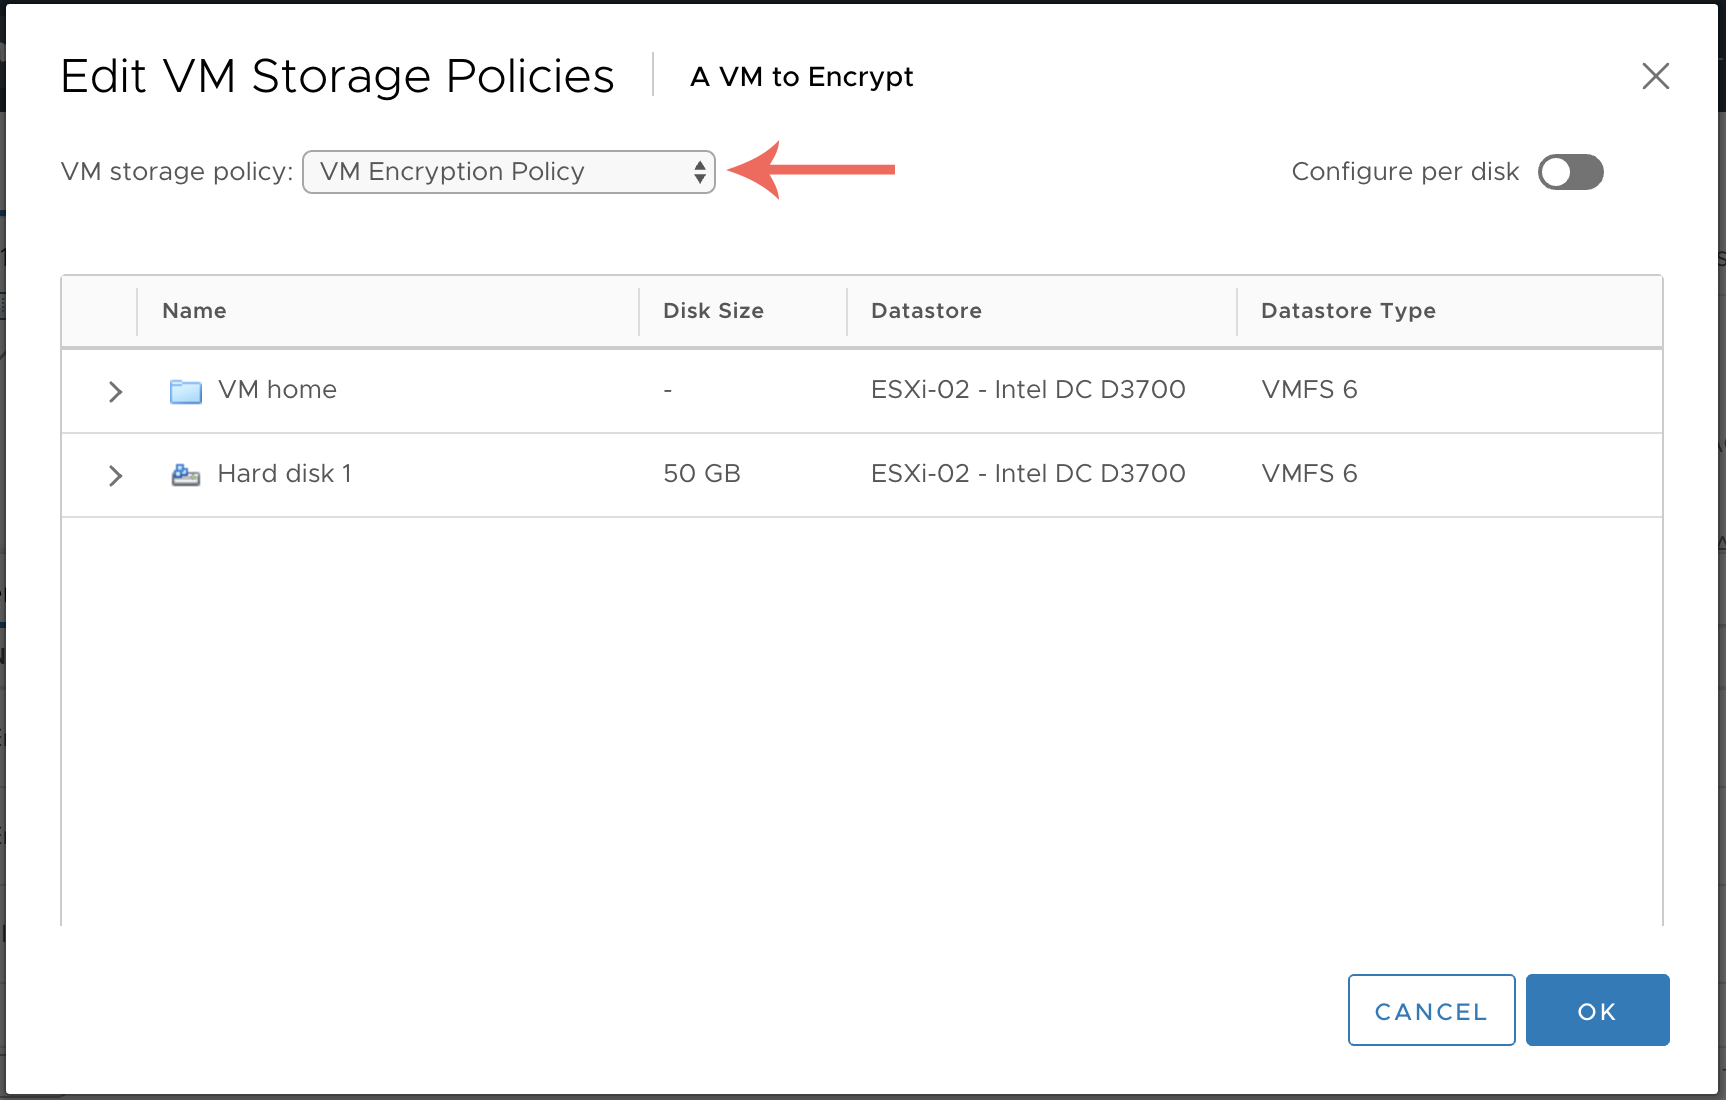
Change the VM storage policy from ‘Datastore default’ to ‘VM Encryption Policy’.
That’s it! The VM will take some time to encrypt so keep an eye on the recent tasks section to see when it has finished.
Conclusion
In this guide I’ve shown the steps necessary to setup data-at-rest encryption within a vSphere 6.7 environment. Due to VMware’s implementation, the use of a 3rd party KMS solution is required to store encryption keys. This is something you’ll need to investigate and decide upon yourself, however for the purpose of this guide I used HyTrust’s KeyControl software.
Unfortunately the native encryption features within vSphere 6.7 do require an enterprise plus or higher license. In a future blog post I’ll be showcasing some other slightly less-expensive ways of using encryption with VMware.
If you have any feedback or questions please send me an email or leave a comment below.
Comments